Lintel Rebar
Open Lintel Rebar and click its illustration to choose four bars, two vertical bars, two horizontal bars or a canopy. Fields change with the selected variant. After configuration, OK proceeds to the command's geometry/generation stage.
Evidence scope: All four UI variants were captured. The Four bars creation service generated three native Rebar sets, saved and reopened with 48 retained bar positions in Revit 2024.3. The other variants remain UI references; their illustrations are not generated output.
The UI reference is from Revit 2027.3; the saved Four bars result below is from Revit 2024.3. Revit was maximized and dialogs retained their natural size.
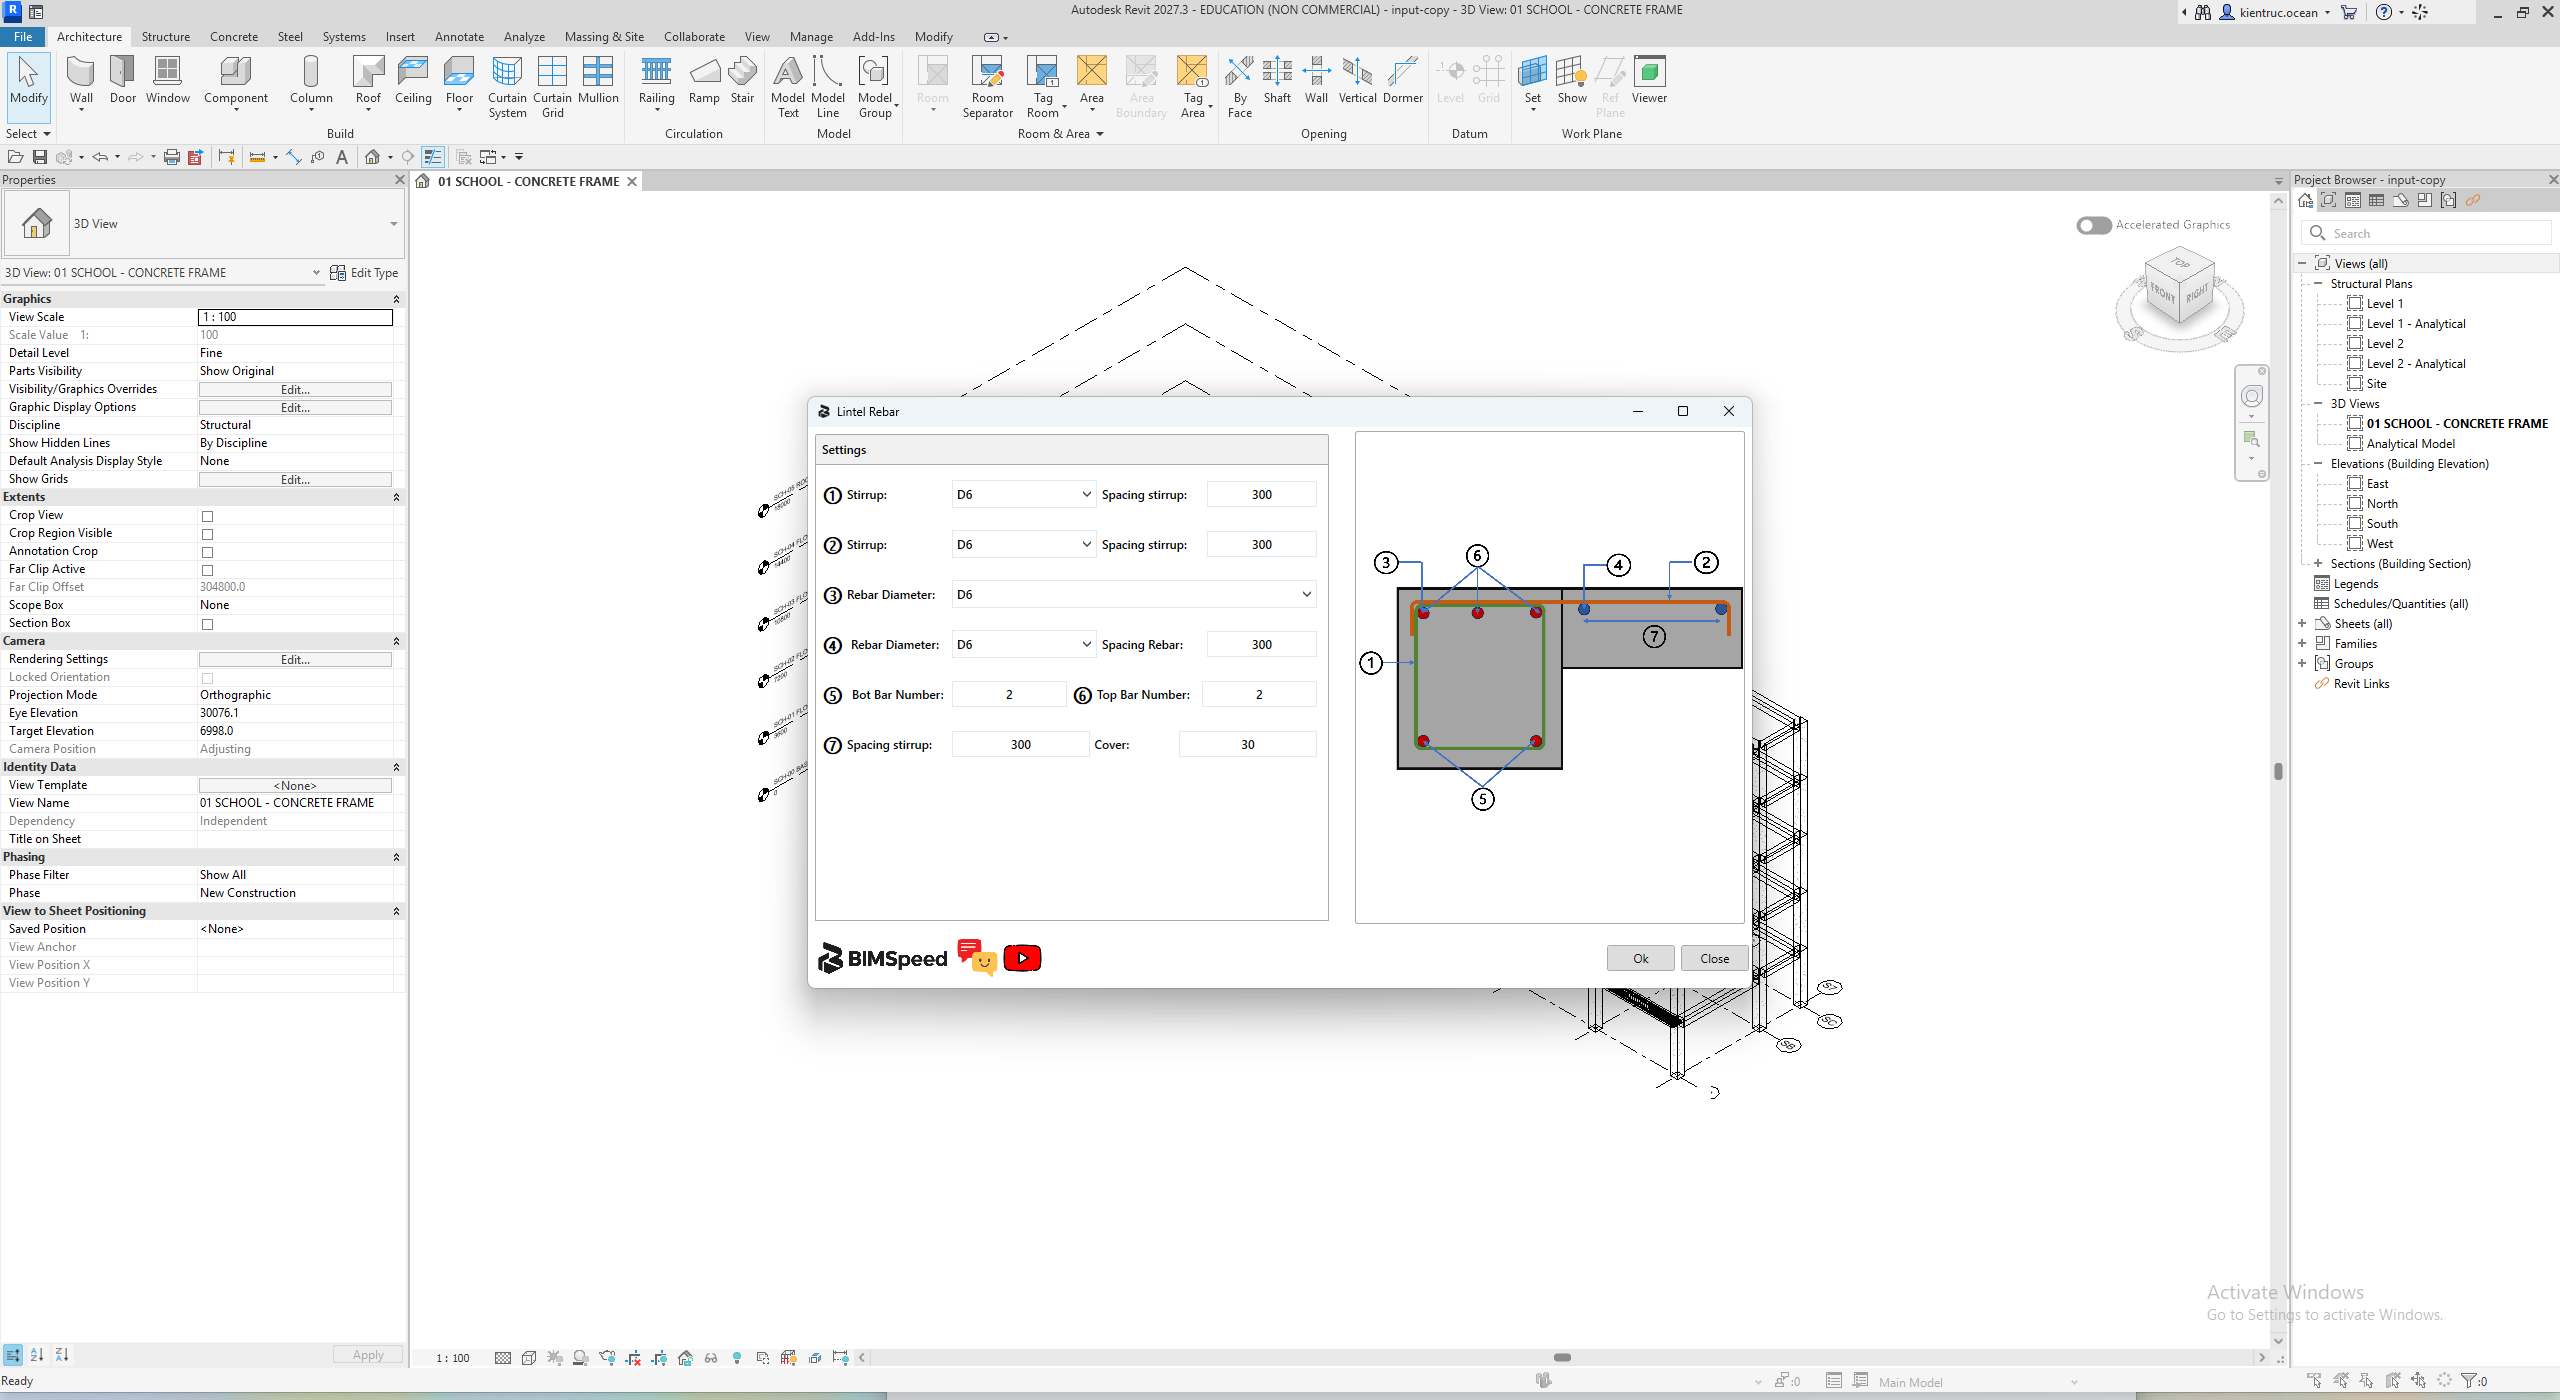
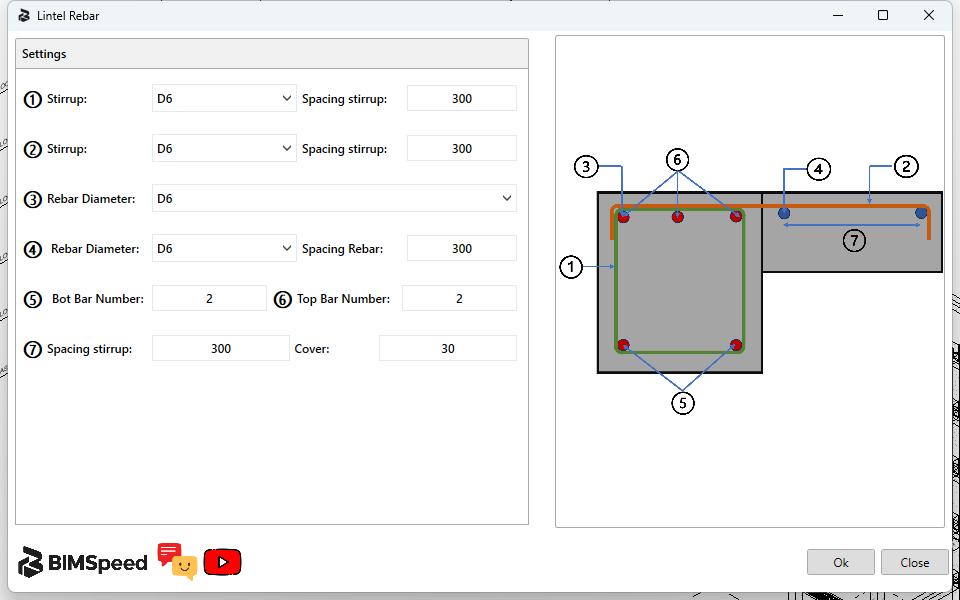
- Canopy is selected in this image. Click the right-hand illustration to choose a variant; the black diagram numbers map to the numbered input rows.
- Rows 1/2 configure lintel stirrups and canopy-slab stirrups separately, each with its own type and spacing.
- Row 3 chooses the lintel longitudinal type; row 4 chooses the canopy-slab bar type and spacing.
- Rows 5/6 set bottom/top lintel quantities. Row 7 repeats the slab-stirrup spacing from row 2; Cover controls bar placement.
- OK proceeds to Revit host selection. Close leaves the tool and retains the interface choices for the next opening; closing does not create bars.
Every setting and action
| Control | Effect and verification |
|---|---|
| Top diameter / Bottom diameter — Four bars | Choose separate top/bottom bar types; the four-bar schematic has two upper and two lower positions. |
| Rebar diameter — Two vertical / Two horizontal | Choose the pair's bar type for the selected orientation; keep variants distinct when inspecting results. |
| Stirrup | Lintel stirrup diameter/type. |
| Spacing stirrup / Maximum spacing | Requested stirrup spacing in mm. Decrease for denser stirrups; increase for fewer. Measure actual spacing after generation. |
| Cover | Concrete cover in mm; inspect it together with bar diameters. |
| Top hook / Bottom hook | Top/bottom hook lengths in mm where available. |
| Canopy — bar diameter / top number / bottom number | Canopy-lintel bar type and separate top/bottom quantities. |
| Canopy — slab stirrup type / spacing | Canopy-slab stirrup type/spacing, separate from lintel stirrups. |
| Canopy — slab bar type / spacing | Canopy-slab bar type/spacing; inspect its distribution direction separately. |
| Illustration / option selector | Open the variant chooser. Variant images below record the captured UI states. |
| OK | Run the selected variant's generation logic; the interface capture did not generate reinforcement. |
| Close | Close the window. The window also retains settings for next time; closing does not generate reinforcement. |
Captured states
Captured D6 and 300 mm values are loaded settings, not detailing recommendations. After generation, select representative rebar to inspect hosts, quantities, diameters, spacing and hooks; this evidence has not yet been collected. RVT saving preserves the model; JSON preserves UI settings.
Choose the variant and host
Open BimSpeed.STR → Beam → Lintel Rebar on a project copy. Click the right-hand illustration to choose a variant, then enter that variant's fields. Four bars uses separate top/bottom types; Two vertical and Two horizontal use a common longitudinal type for the pair; Canopy adds slab bars/stirrups. Select the beam Family Instance to reinforce, rather than a door or an opening boundary.
After OK, the window hides for one or more Revit host picks. Select the intended lintel/canopy hosts and Finish. Canopy needs a compatible canopy family/geometry; an arbitrary rectangular beam is not an equivalent host. The window can return afterward; its return alone does not prove reinforcement was created.
The four interfaces
Two vertical bars
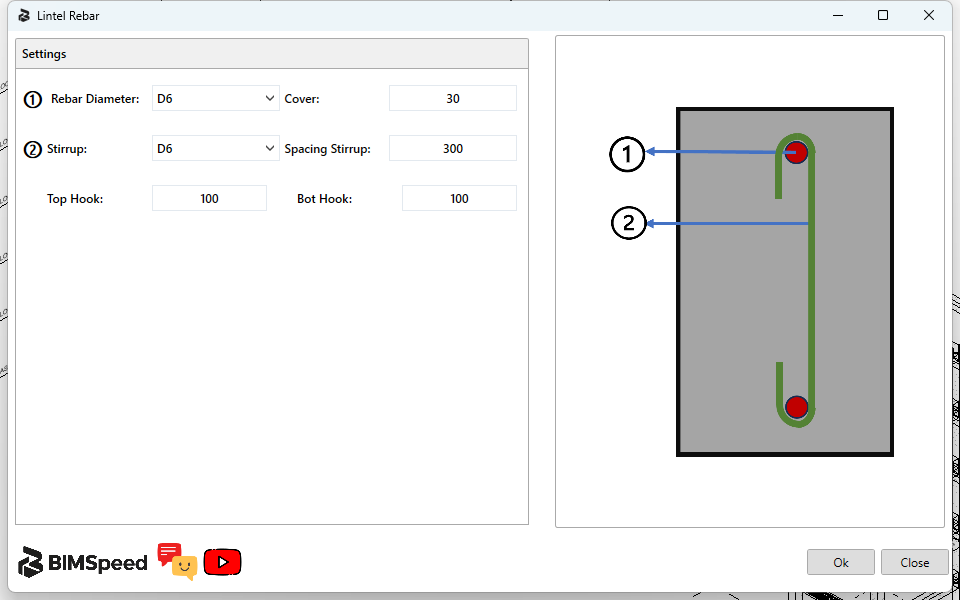
One longitudinal type, cover, stirrup type/spacing and separate top/bottom hook lengths. The pair is vertical in section.
Four bars
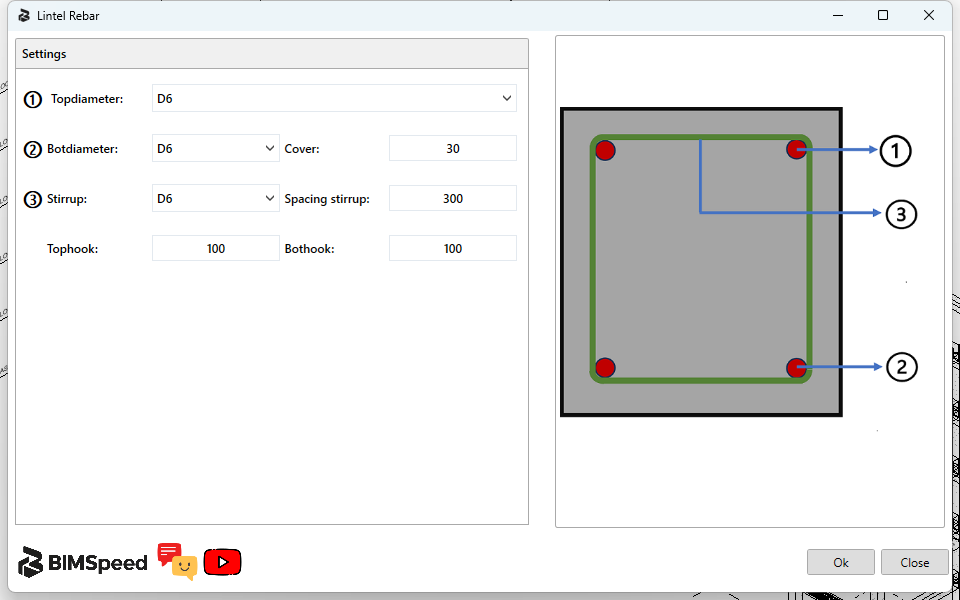
Two upper and two lower positions, with independent types for those groups and separate top/bottom hooks.
Two horizontal bars
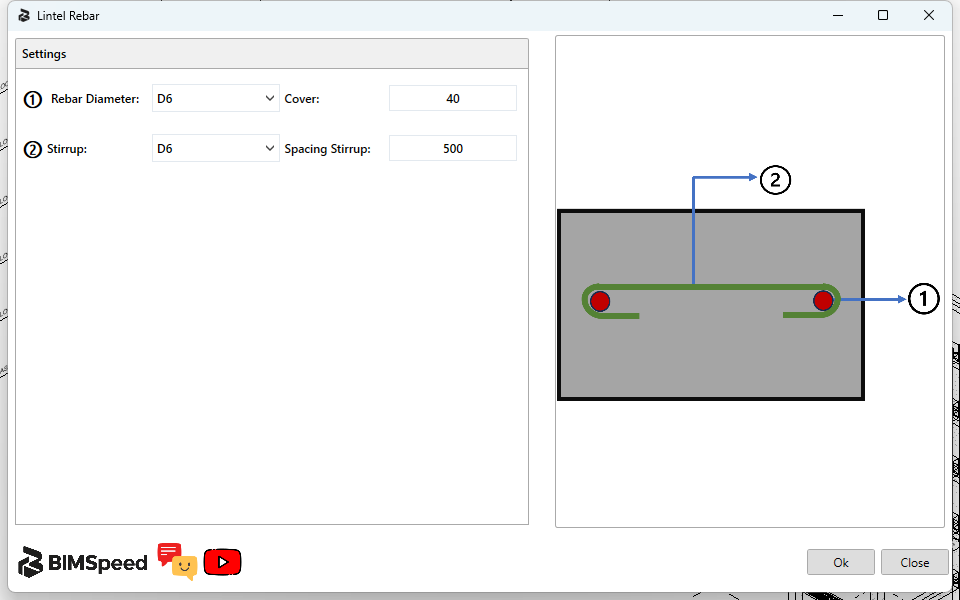
The pair is horizontal in section. This interface has no pair of top/bottom hook inputs like the vertical variant. Its cover/spacing values belong to this particular state.
In the Canopy image at the top, rows 2 and7 both control canopy-slab stirrup spacing; they are not independent distribution directions. Avoid entering conflicting intentions and recheck the retained value after changing/reopening the variant. Row 4 is the separate slab-bar type/spacing.
Saved and reopened Four bars result
The Four bars creation service was exercised on native beam 405566 in a project copy in Revit 2024.3: cover 25 mm, upper/lower hooks 200 mm, longitudinal D12, stirrup D8, maximum spacing 150 mm. Lintel creation used an R24 source build; the UI reference above is from the installed release. This case did not retest ribbon selection or the other variants.
After saving and opening a copy in a new Revit process: top set 476041 contained two D12 bars, bottom set 476042 two D12 bars, and stirrup set 476043 44 D8 positions at 150 mm spacing. Total: 48 bar positions. Hosts, types, quantities and lengths persisted.
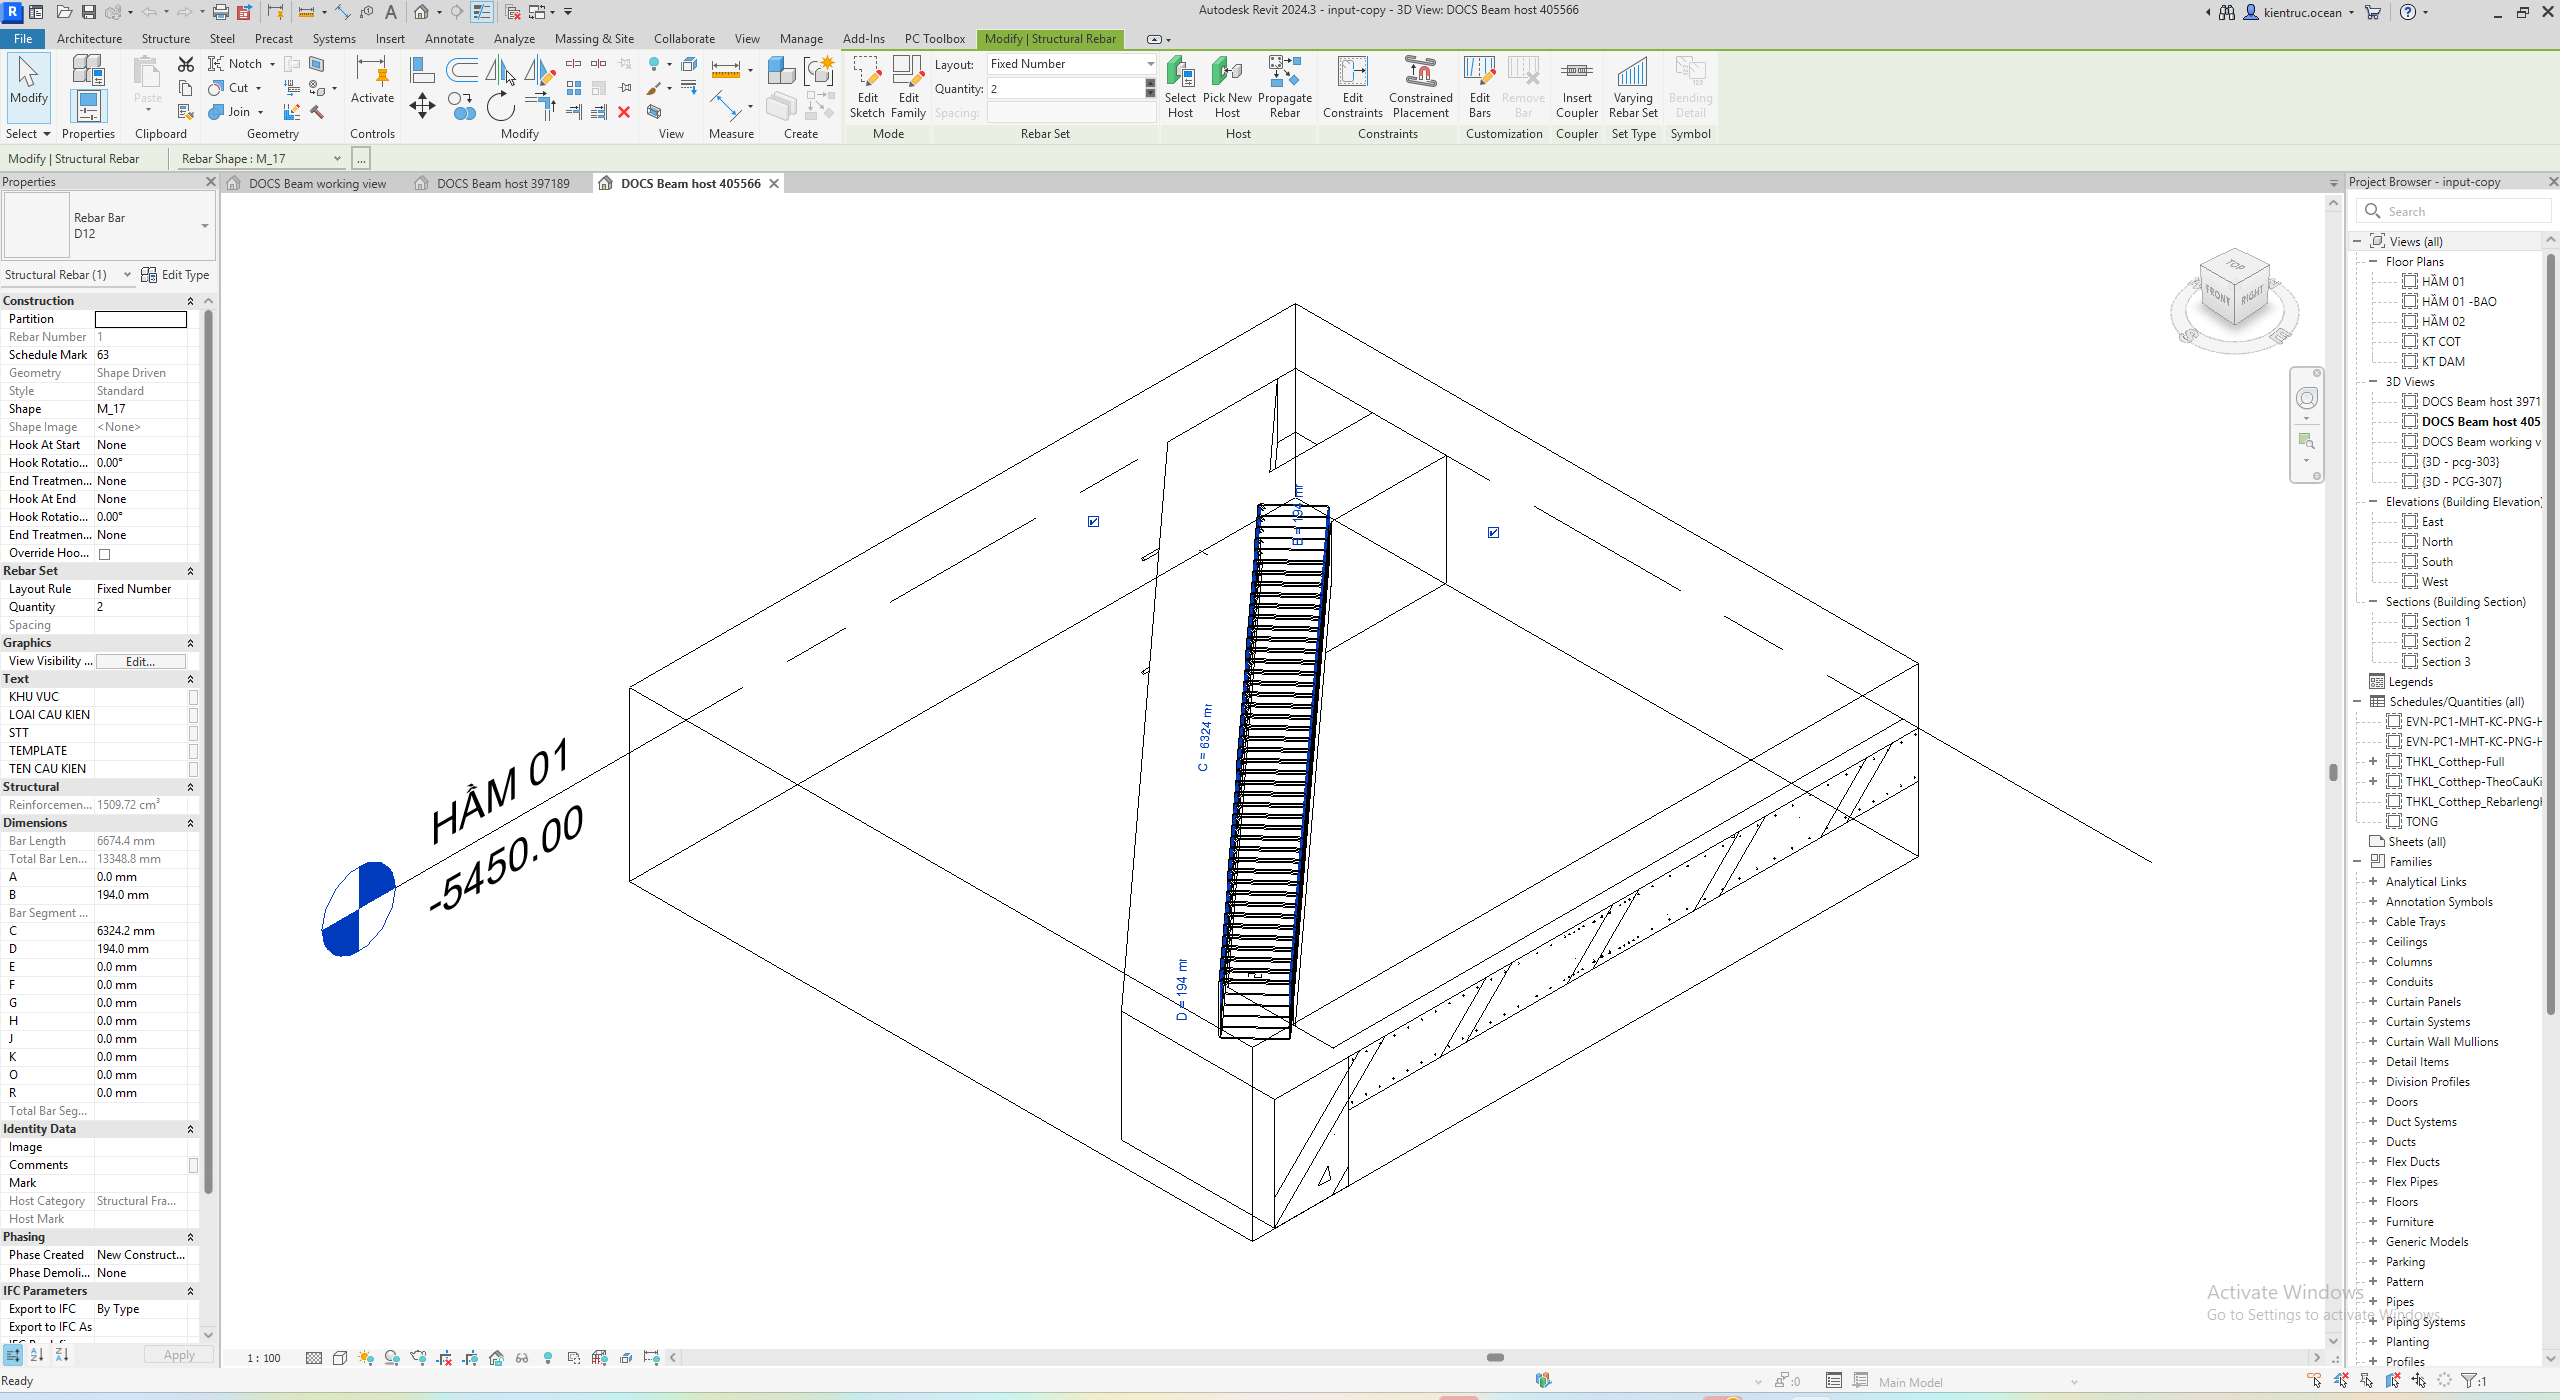
- Selected D12 type. 2. Quantity 2, not all four longitudinal bars. 3. 6674.4 mm Bar Length, including the illustrated bent portions. 4. Actual project-host reinforcement.
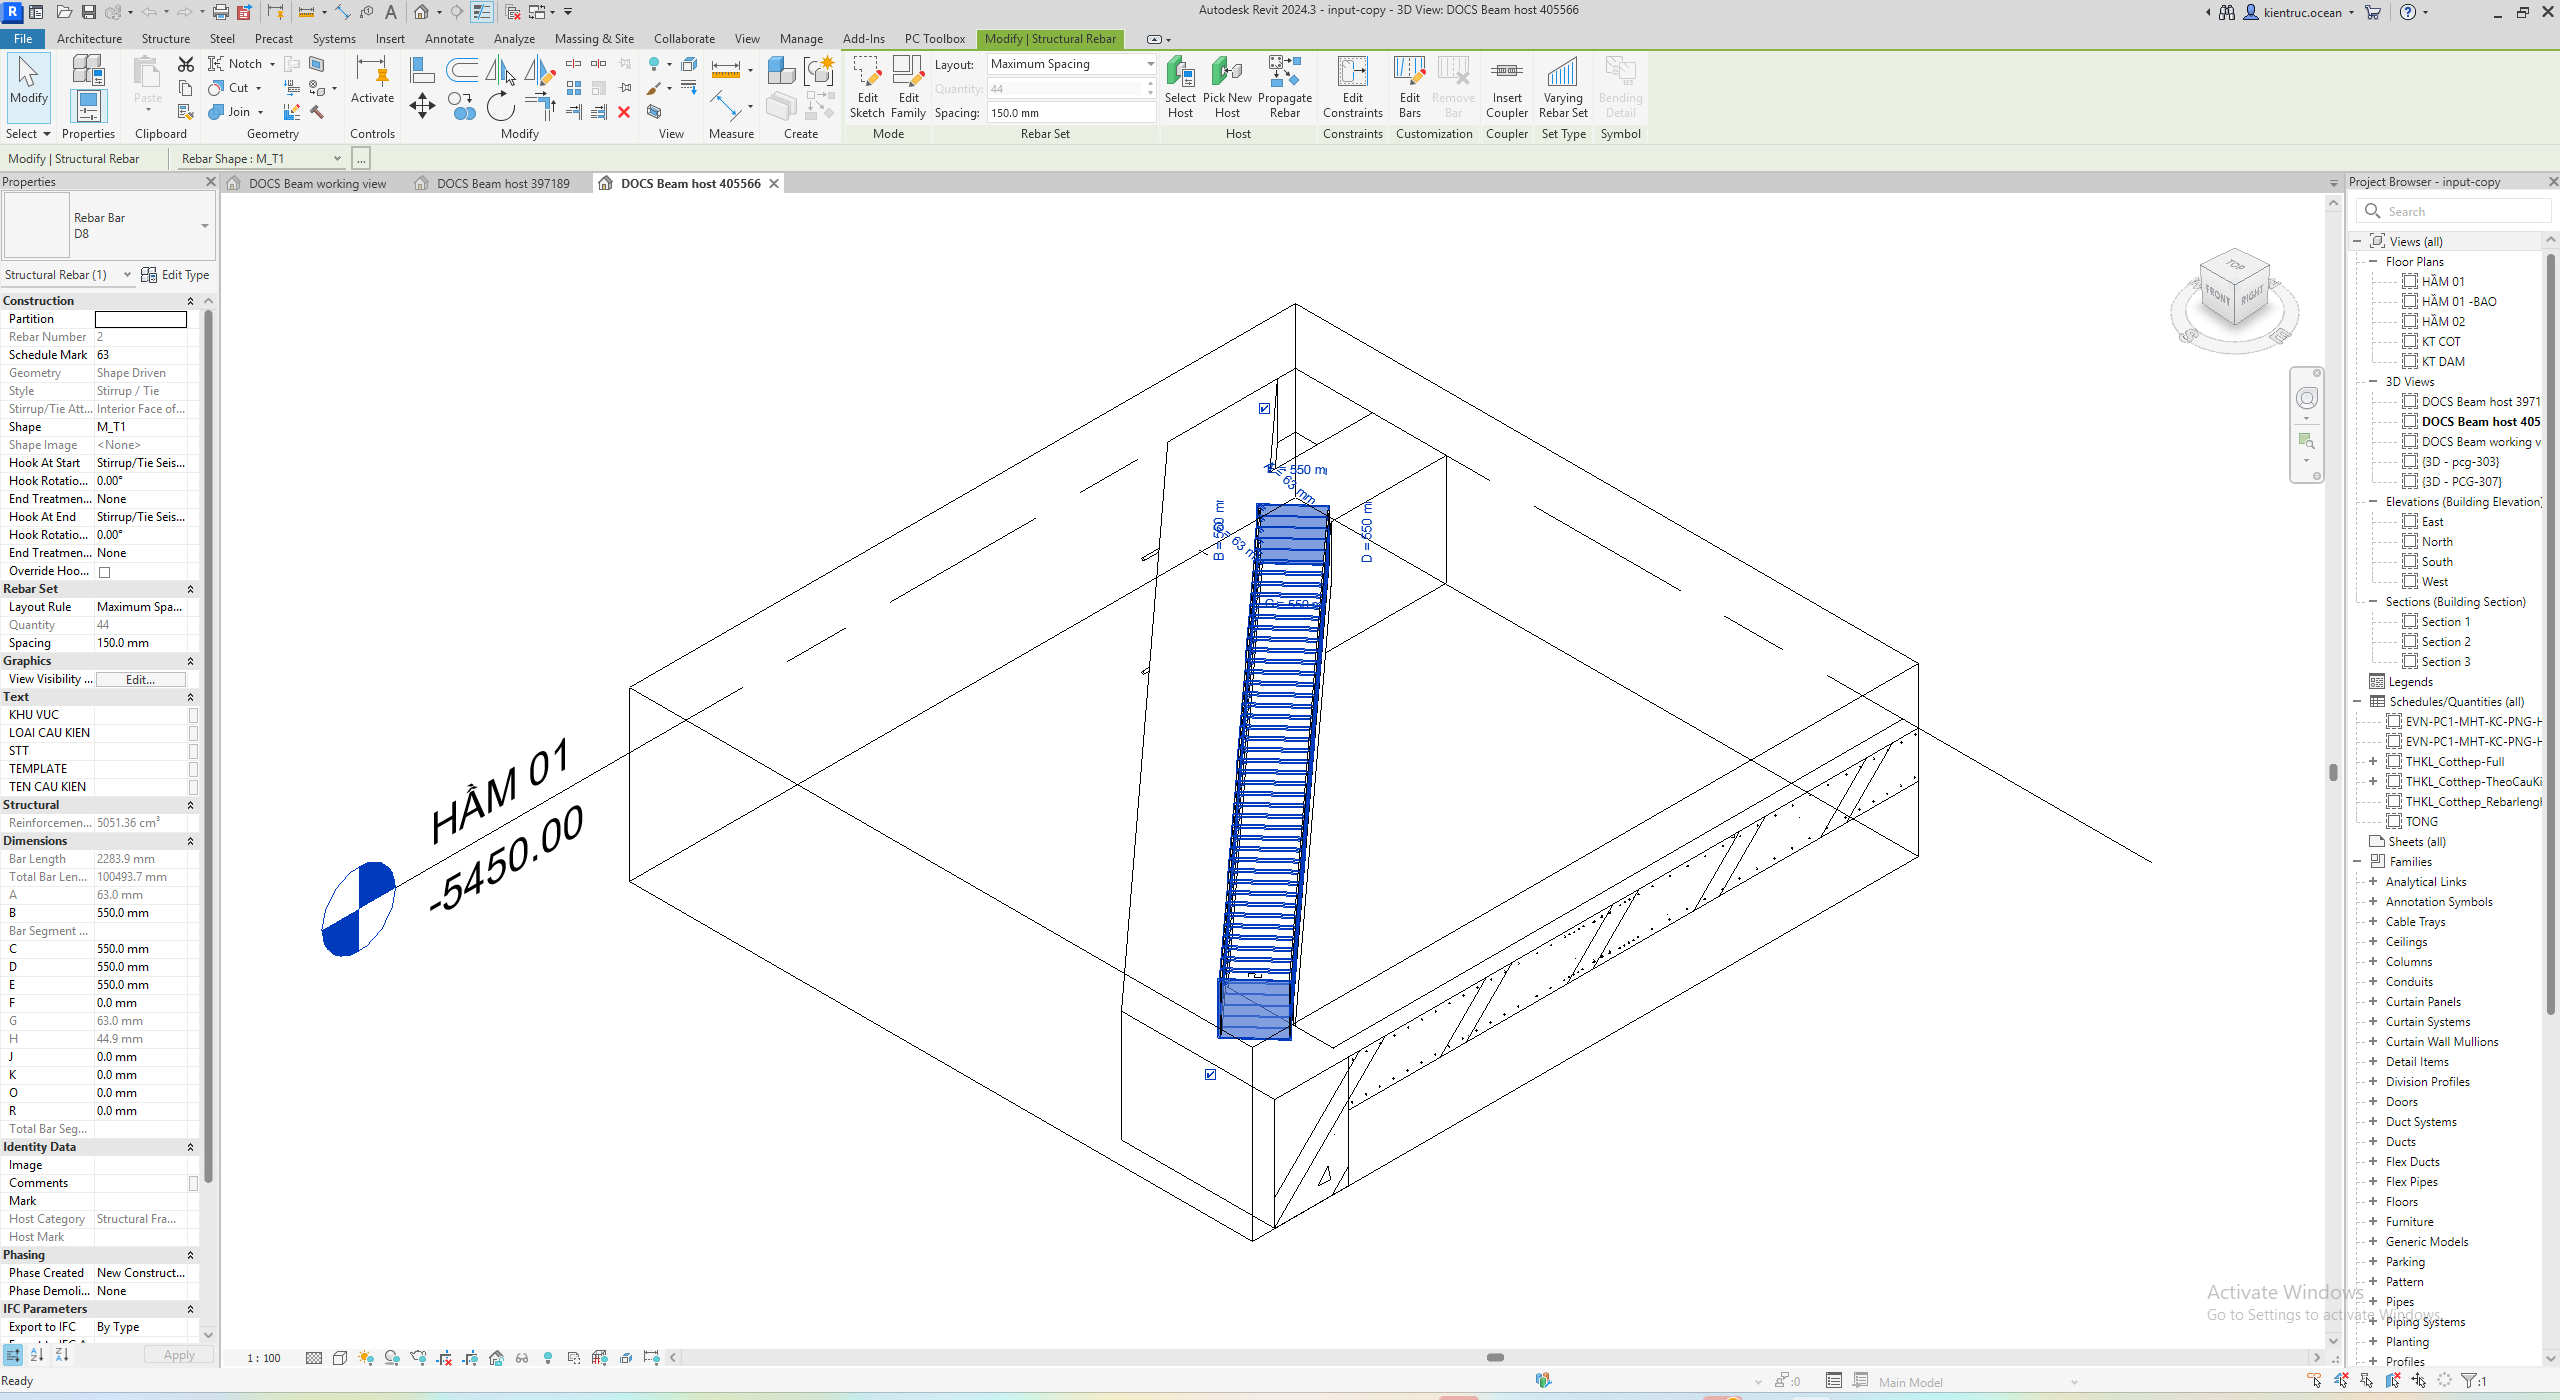
- D8. 2. Maximum Spacing 150 mm, Quantity 44. 3. One stirrup's Bar Length. 4. Persisted cage positions; this quantity does not apply to other beam lengths.
This was initial creation on a host without Rebar. Updating an existing cage and preserving manual edits were not tested. The private verification RVT is not a public download.
Generate, inspect, edit and save
Stirrup-spacing fields request the maximum spacing for their group. After generation, inspect actual spacing and Quantity in Revit rather than inferring count from length divided by the input alone. For example 300→200 mm requests a layout no sparser than the new maximum; changing cover also changes layout length, so compare one edit at a time.
In 3D, use Selection Box around the host and Detail Level Fine. Inspect top/bottom bars and the separate lintel/slab bar and stirrup groups. Select a representative of each for Host, Bar Type, Quantity, Spacing, shape and hooks. The Four bars example above shows saved native output; the other variants' coloured schematics remain illustrations.
For edits, inspect the existing bars on a copy before rerunning; updating an existing cage has not been verified here. Undo an unsuitable generation before trying new settings to avoid adding two cages. Save As a separate RVT and reopen to inspect it. Close retains interface choices even without generation; it does not generate bars or save an RVT for you.
No verified lintel/canopy result model is offered for download. Practise on a copy containing the correct host/family and retain the input separately. Captured D6/300 mm values are not project design settings.
Download an instructional Revit 2027 input: use input-school.rvt, find beam 427351 with Manage → Select by ID and inspect its host/family before selecting a variant. This is a separate practice input; alignment-result.rvt is an elevation-adjustment result, not Lintel output. The native project result pictured above is not in this package.