Grid Dimension — Practical guide
Recorded in Revit 2027.3 with the English interface. Number 1 identifies the controls or result discussed immediately above the image. Click an image to open its full resolution.
Verification scope
Verified horizontal, vertical and oblique straight-grid dimensions, two dimension types and paper-space distance 5/10 mm at 1:100. Curved grids are unsupported. Repeated runs add dimensions.
Settings reference · Practice RVT · All five guides
Video — English (2:25)
English transcript · English subtitles SRT · Chapter titles
Google Gemini Charon narration, directed in neutral American English. Chapter cuts, brief zooms and highlights follow the measured speech. Enable English subtitles in the video player.
1. Find the command and settings (0:00)
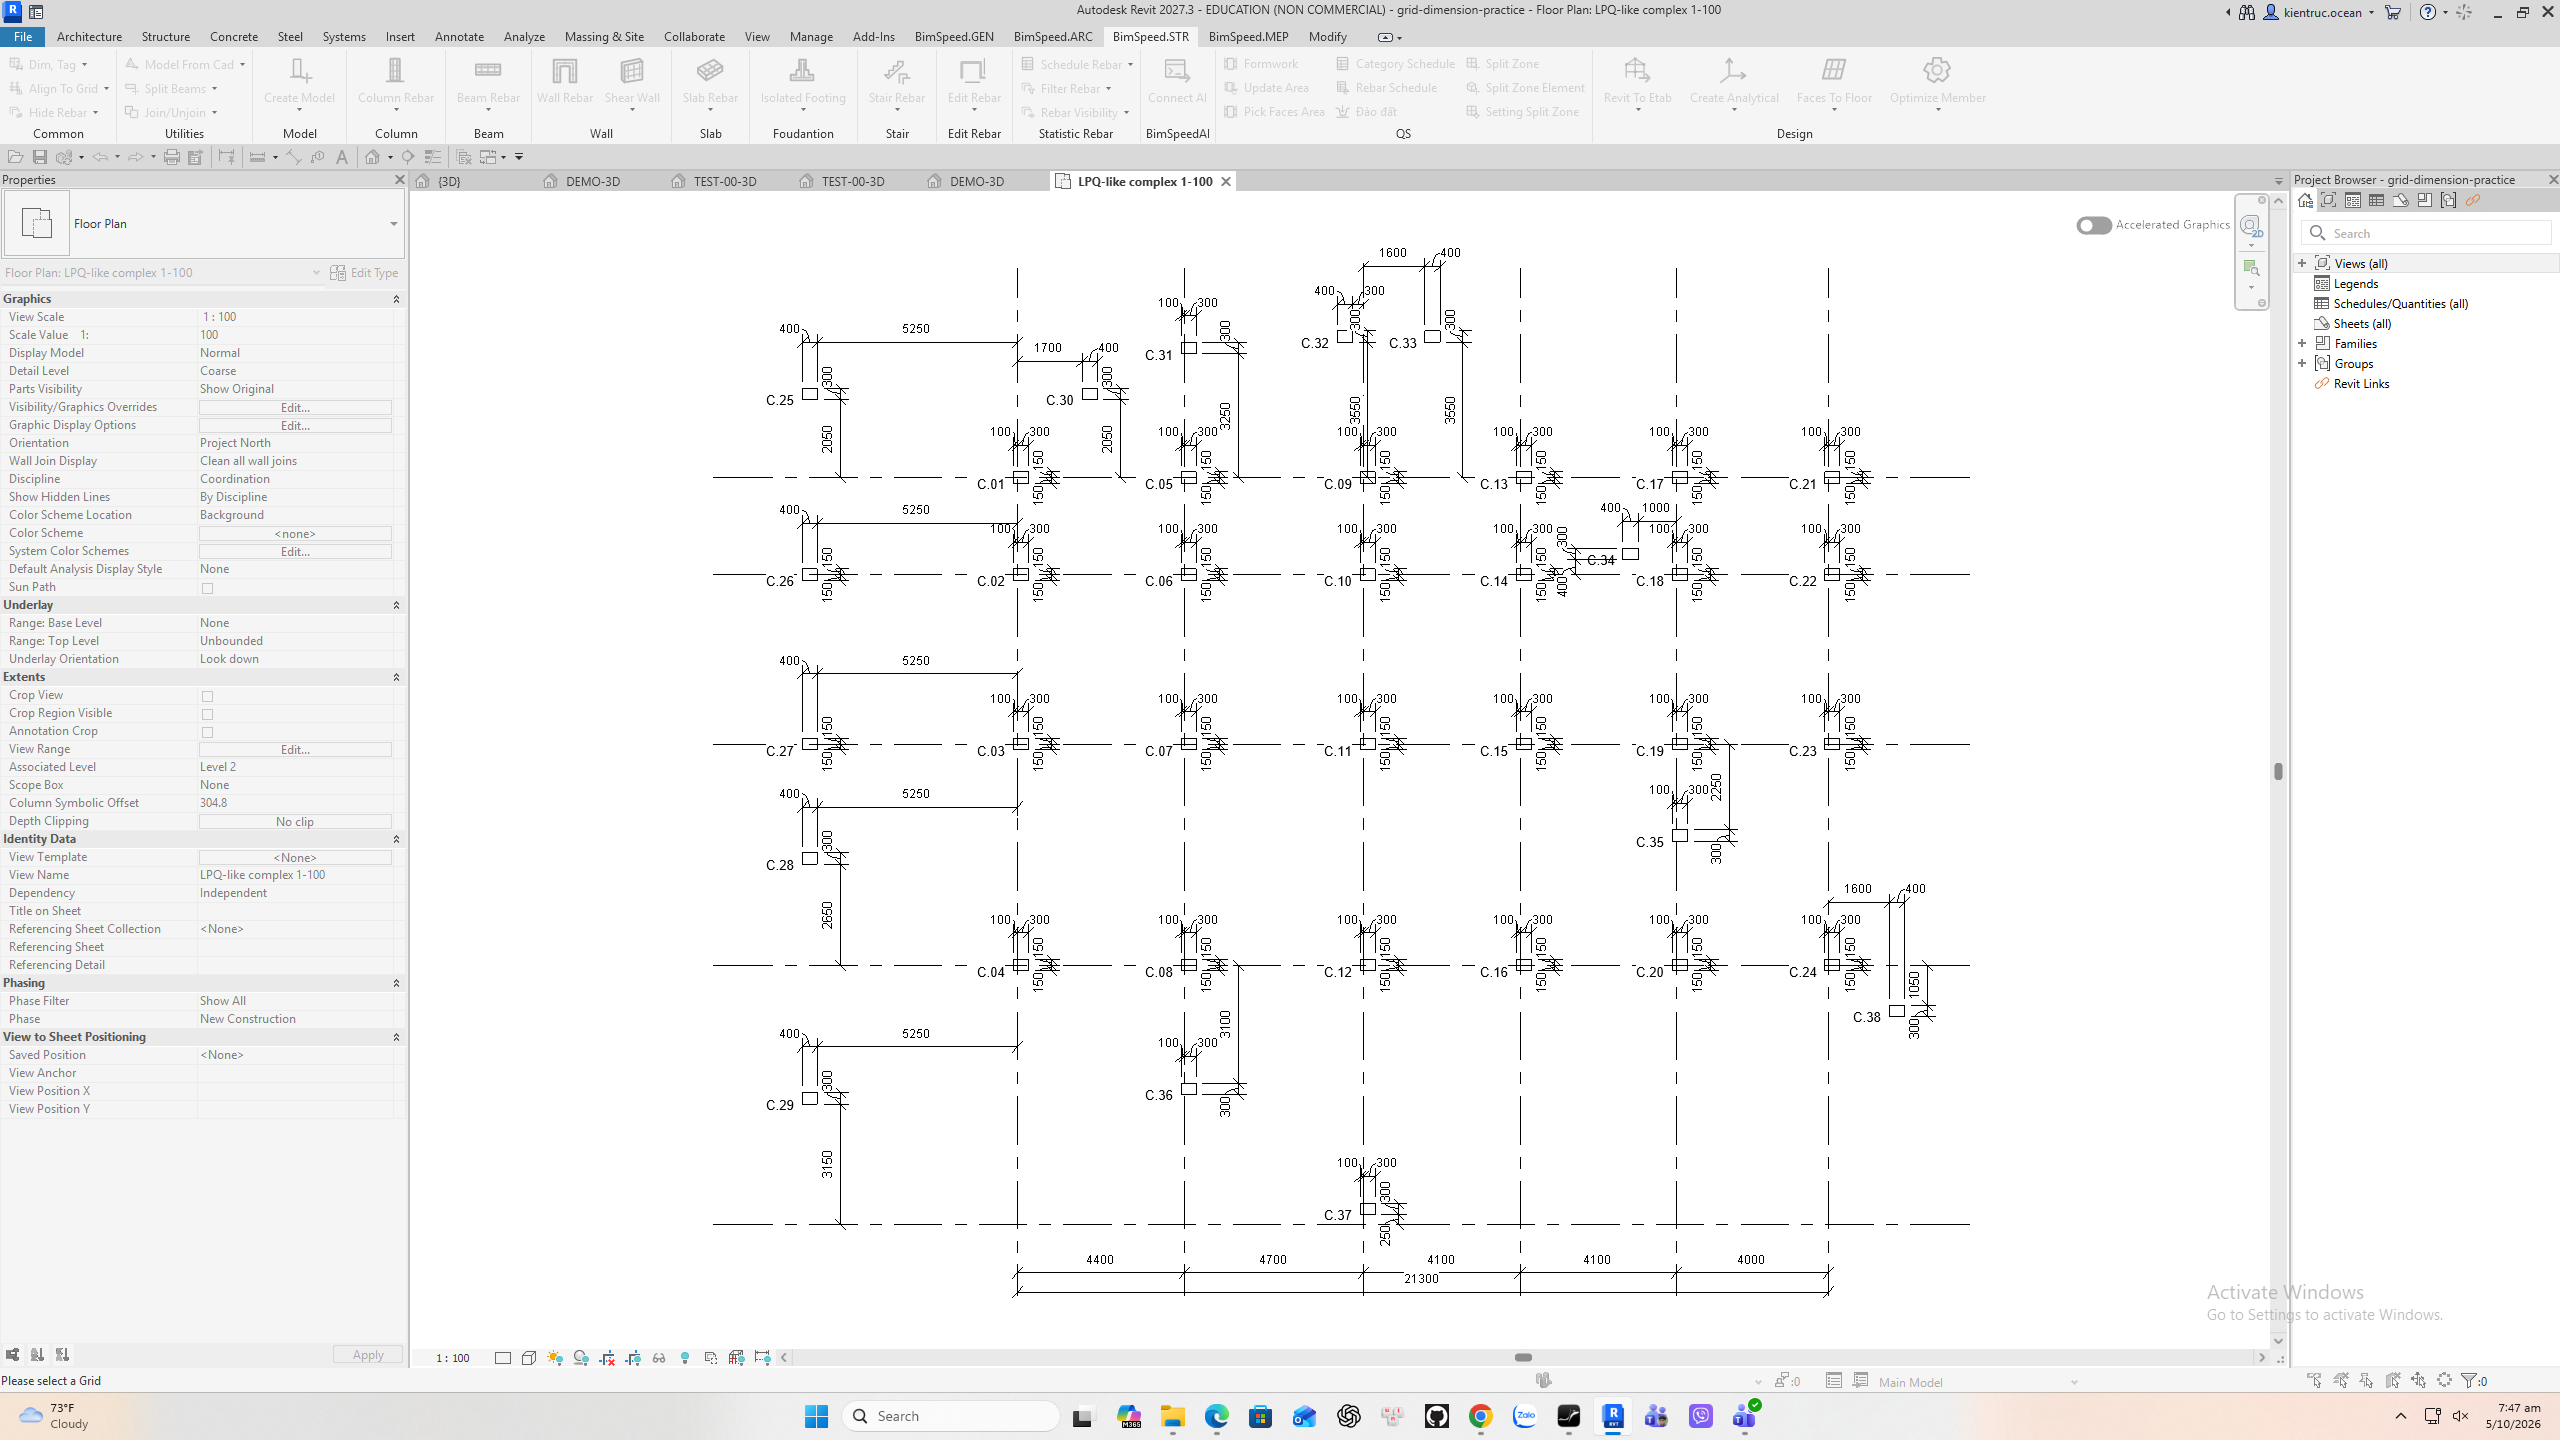
Open a plan containing visible straight grids. In BimSpeed dot A R C, expand Dim. Use Dim Setting to choose the styles and separation before running Create Grid Dim. The same creation command is also available under Dim, Tag on the structural ribbon.
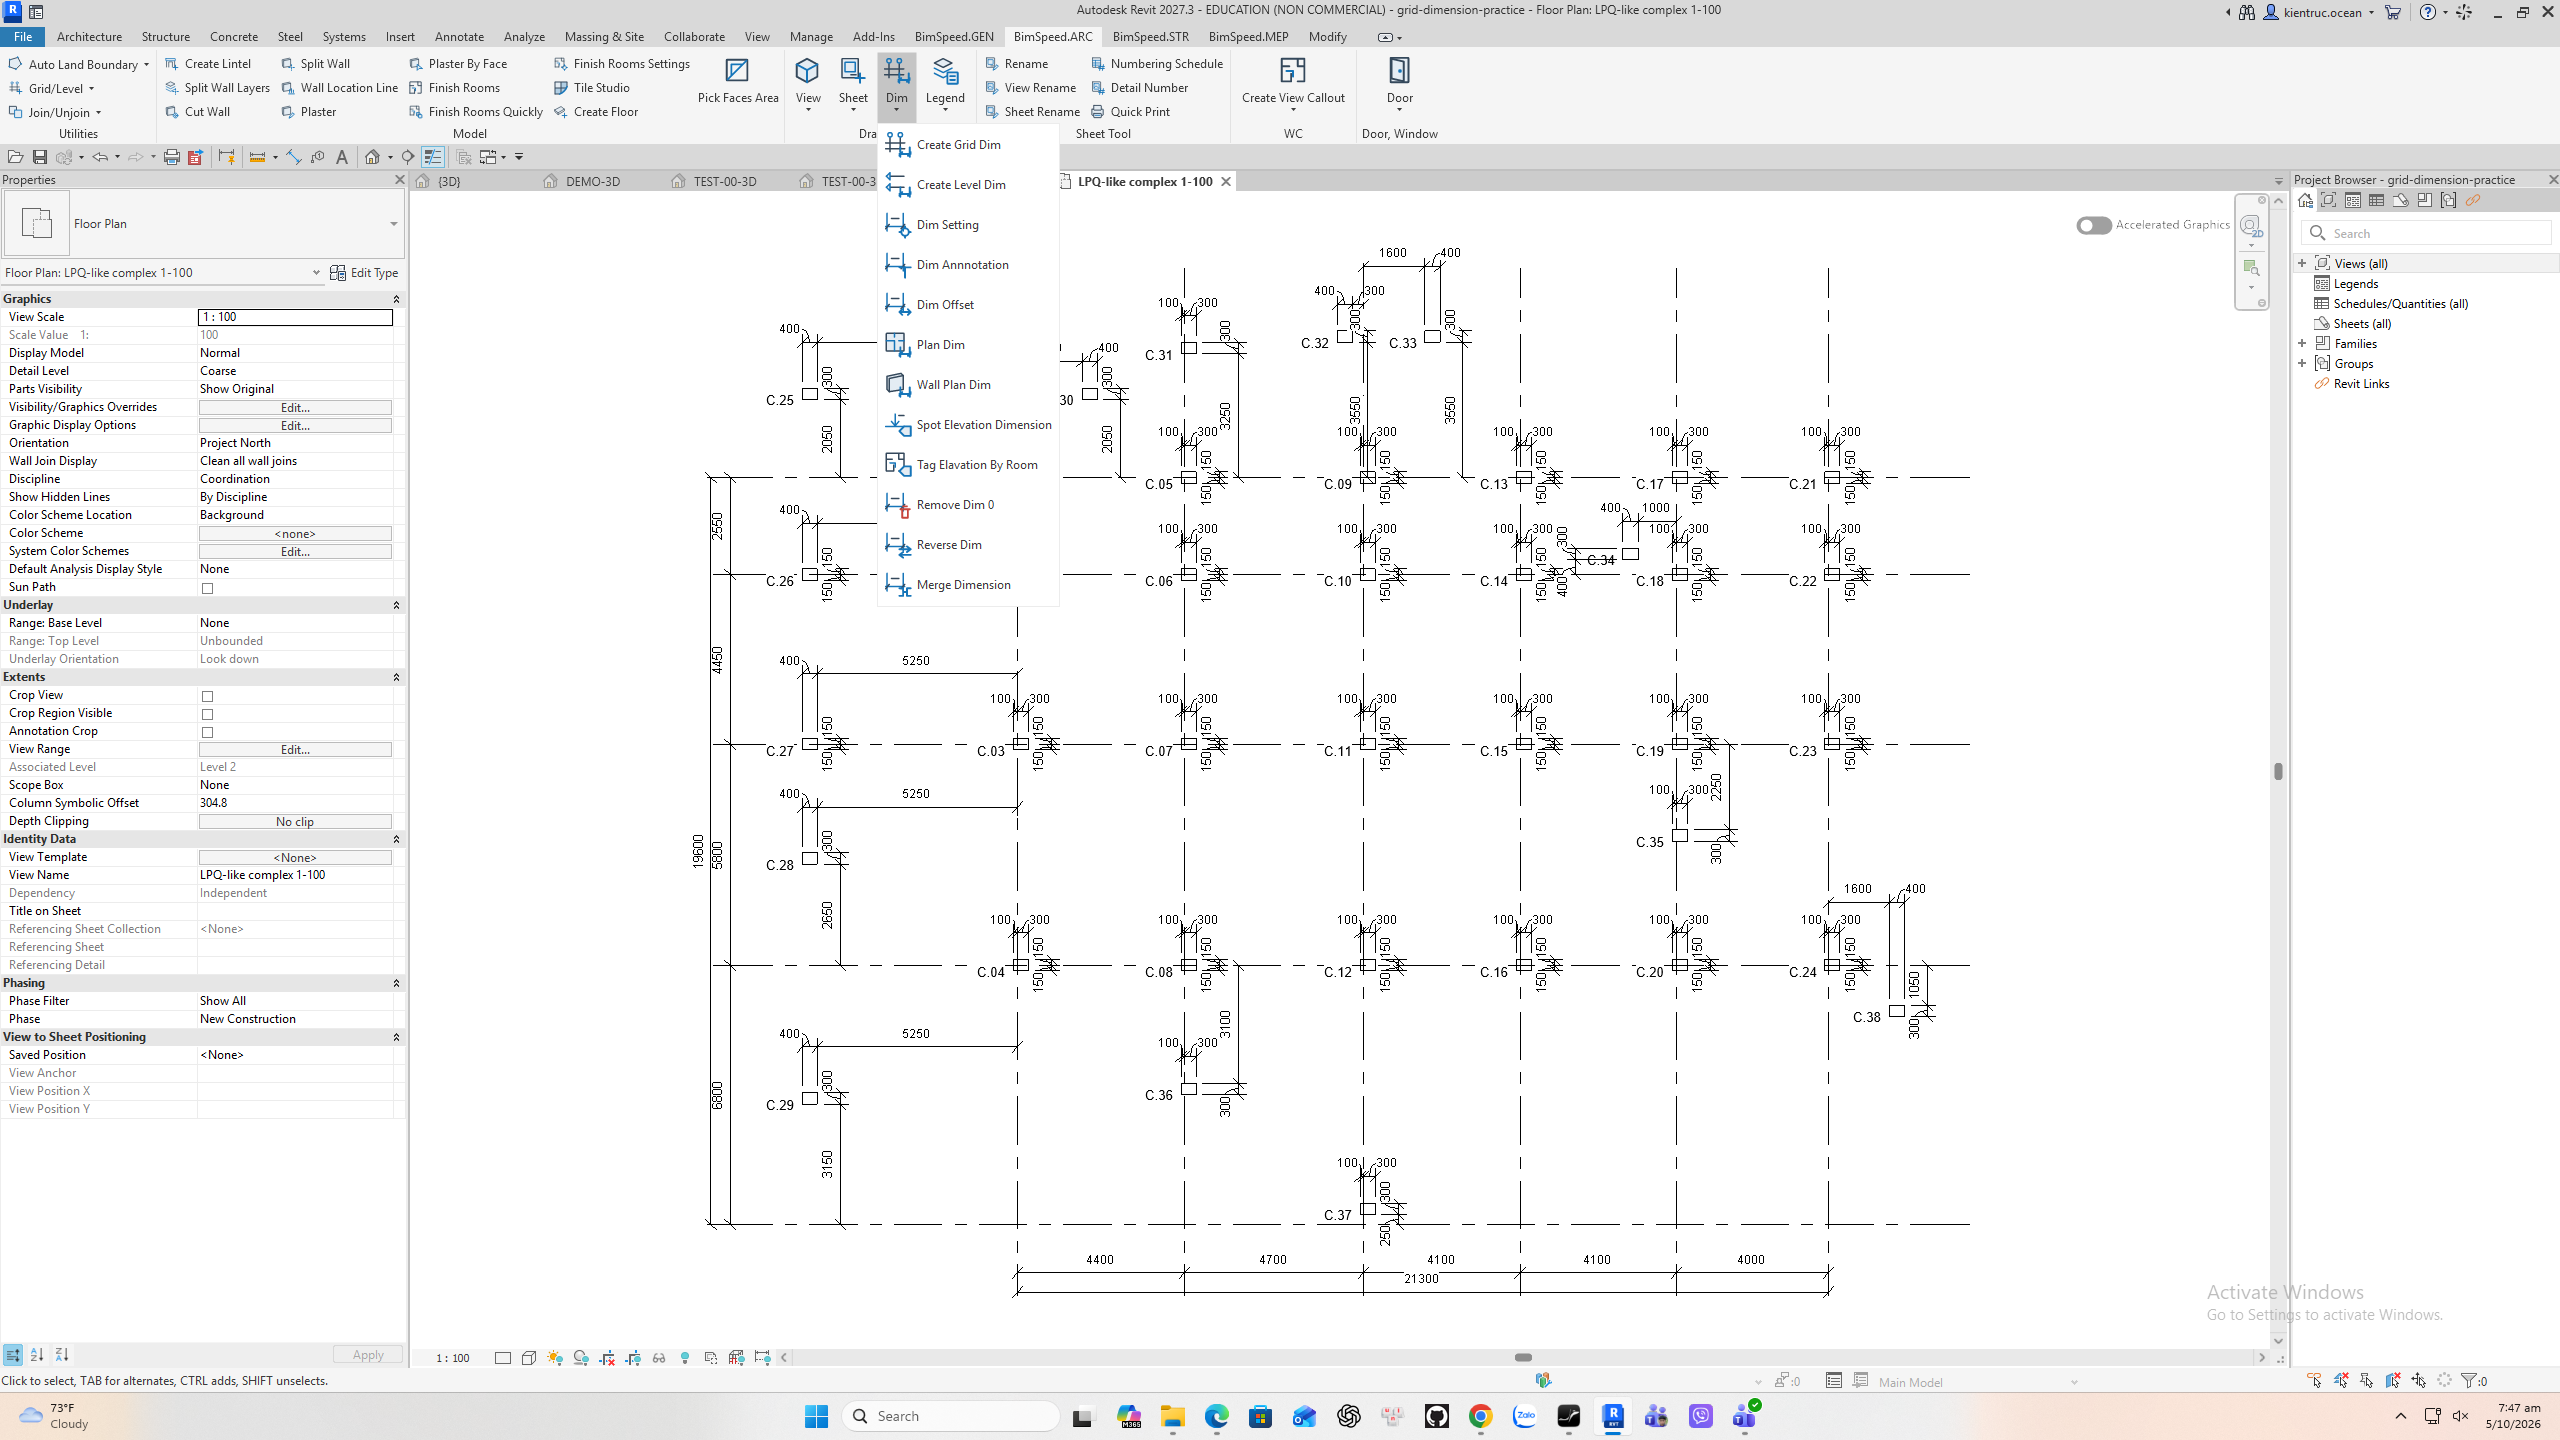
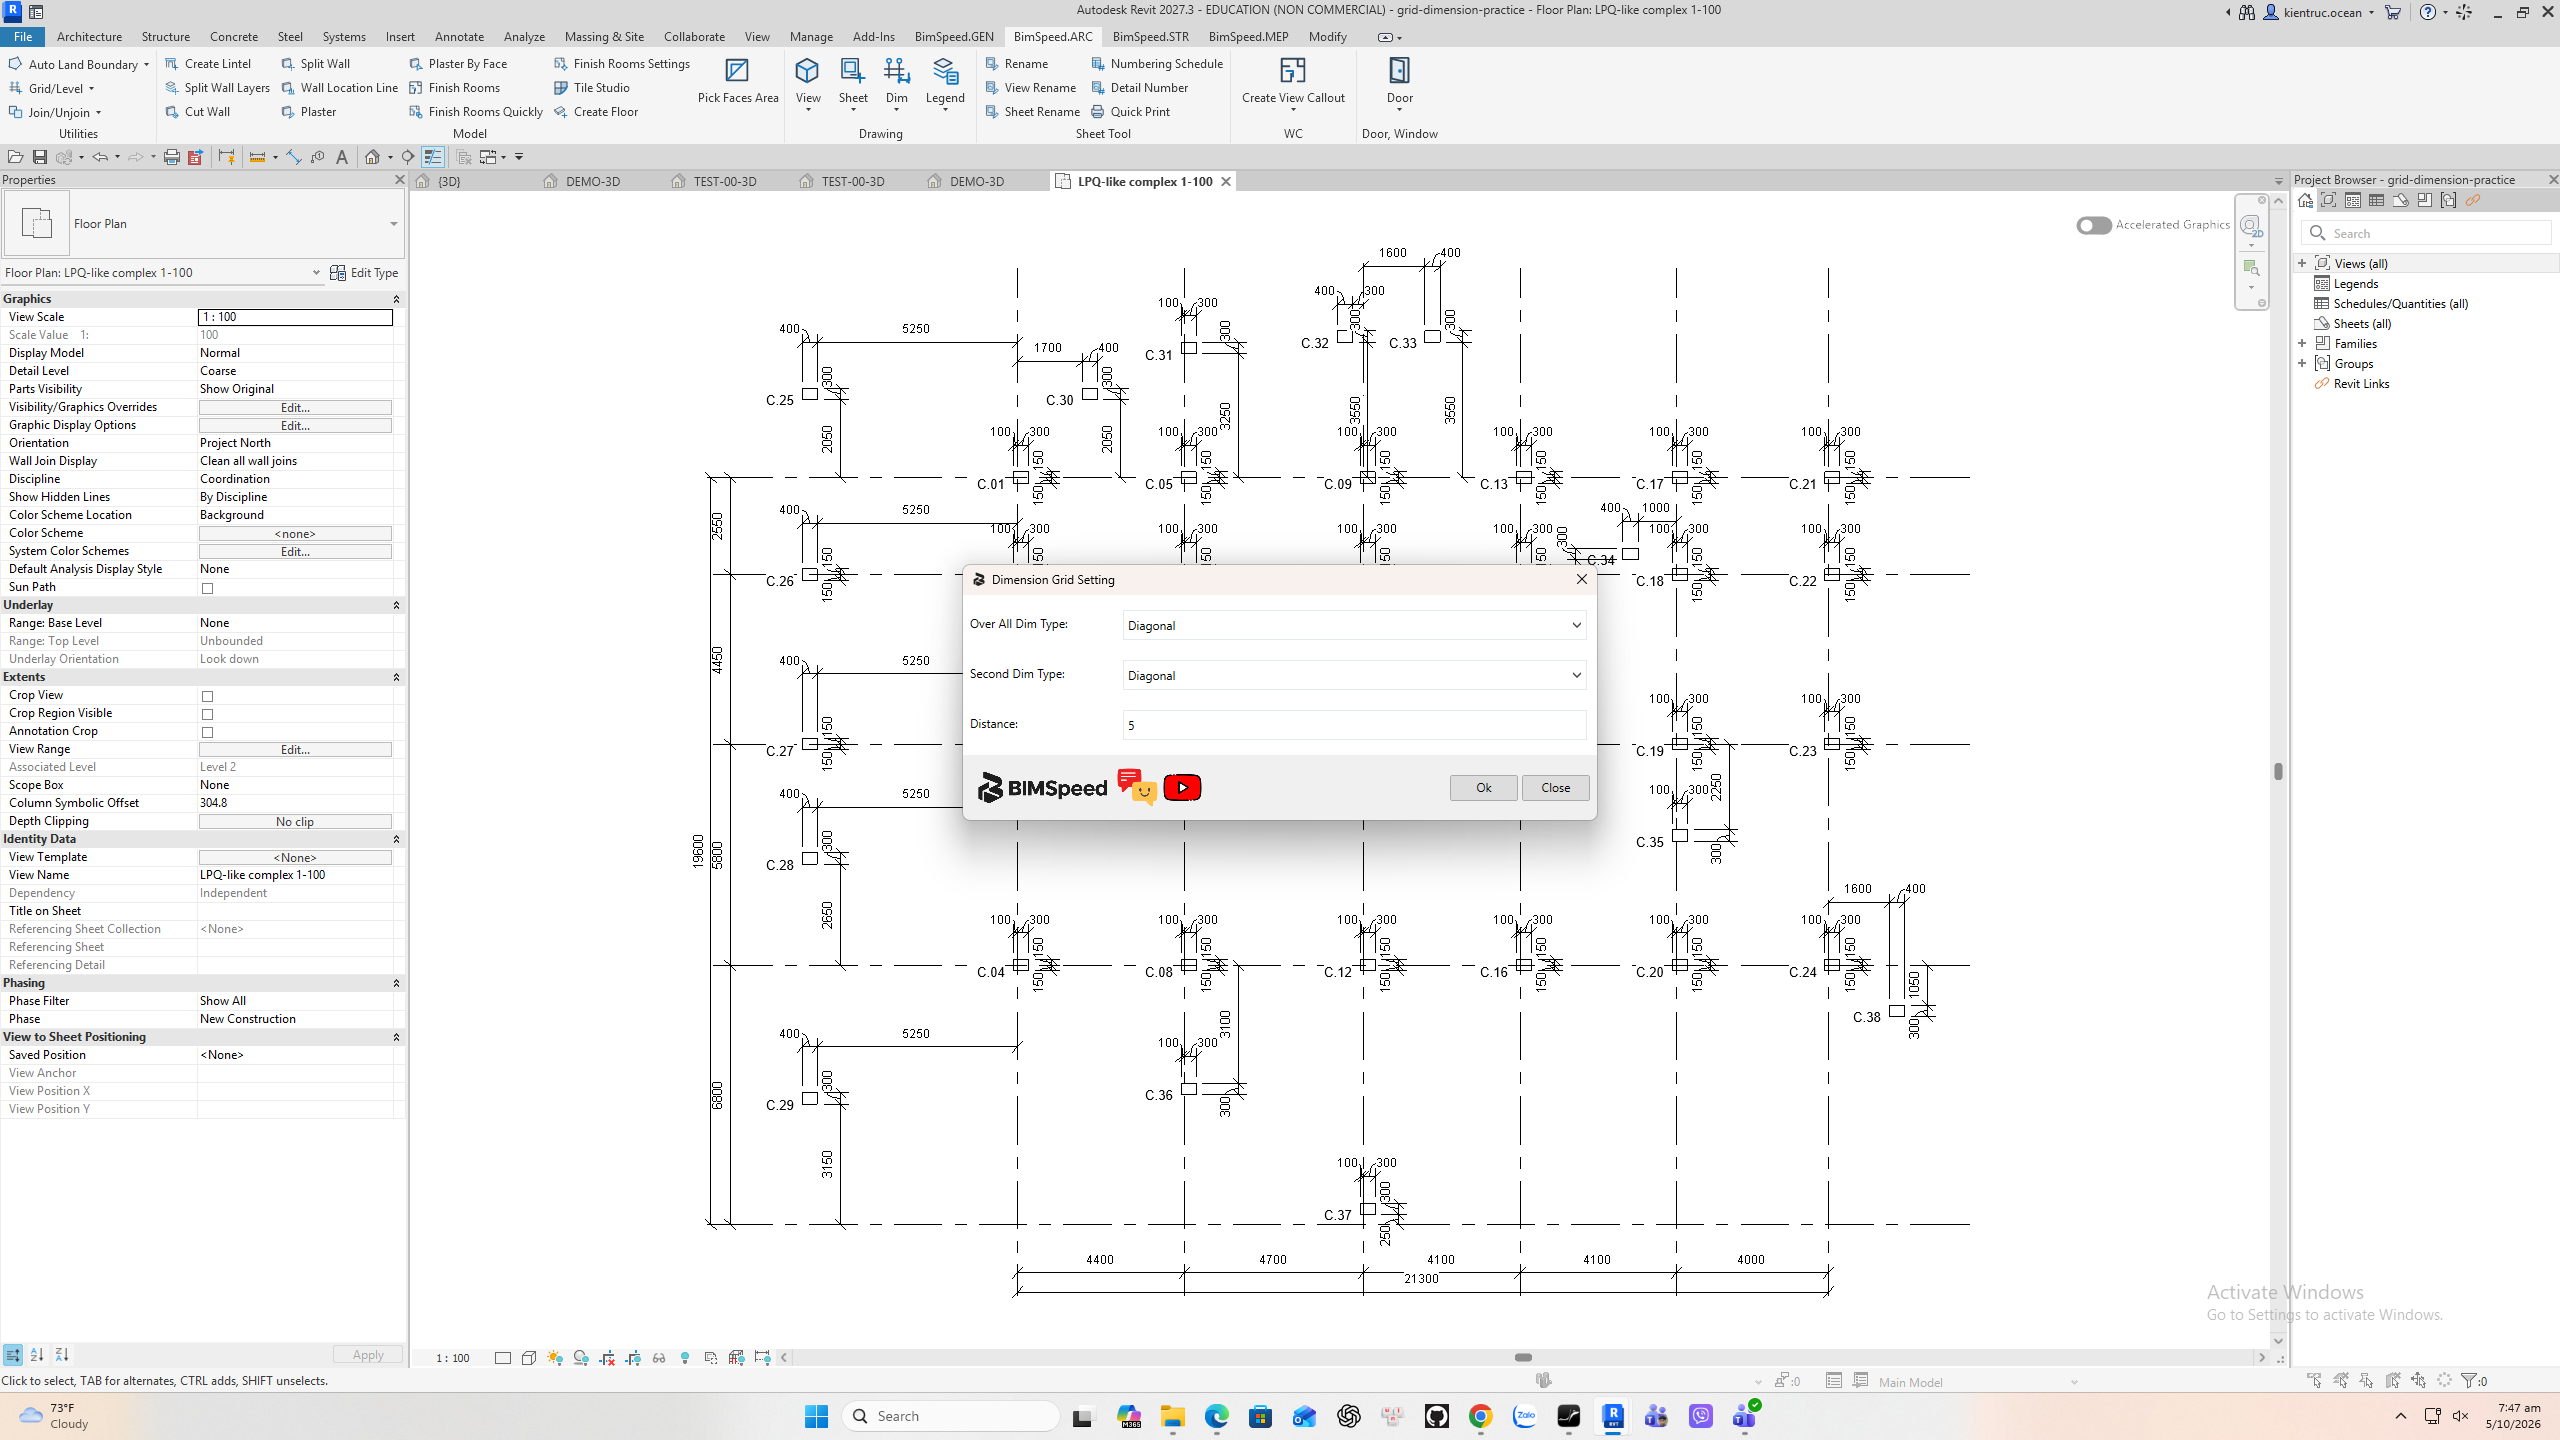
2. Set both dimension types (0:18)
Choose the overall dimension type and the second, or chain, dimension type independently. In this first example both are Diagonal. Distance is five millimeters on paper. At a view scale of one to one hundred, that corresponds to five hundred millimeters in the model. Choose the types first, because changing the overall type can reset Distance.
3. Create the horizontal chain (0:39)
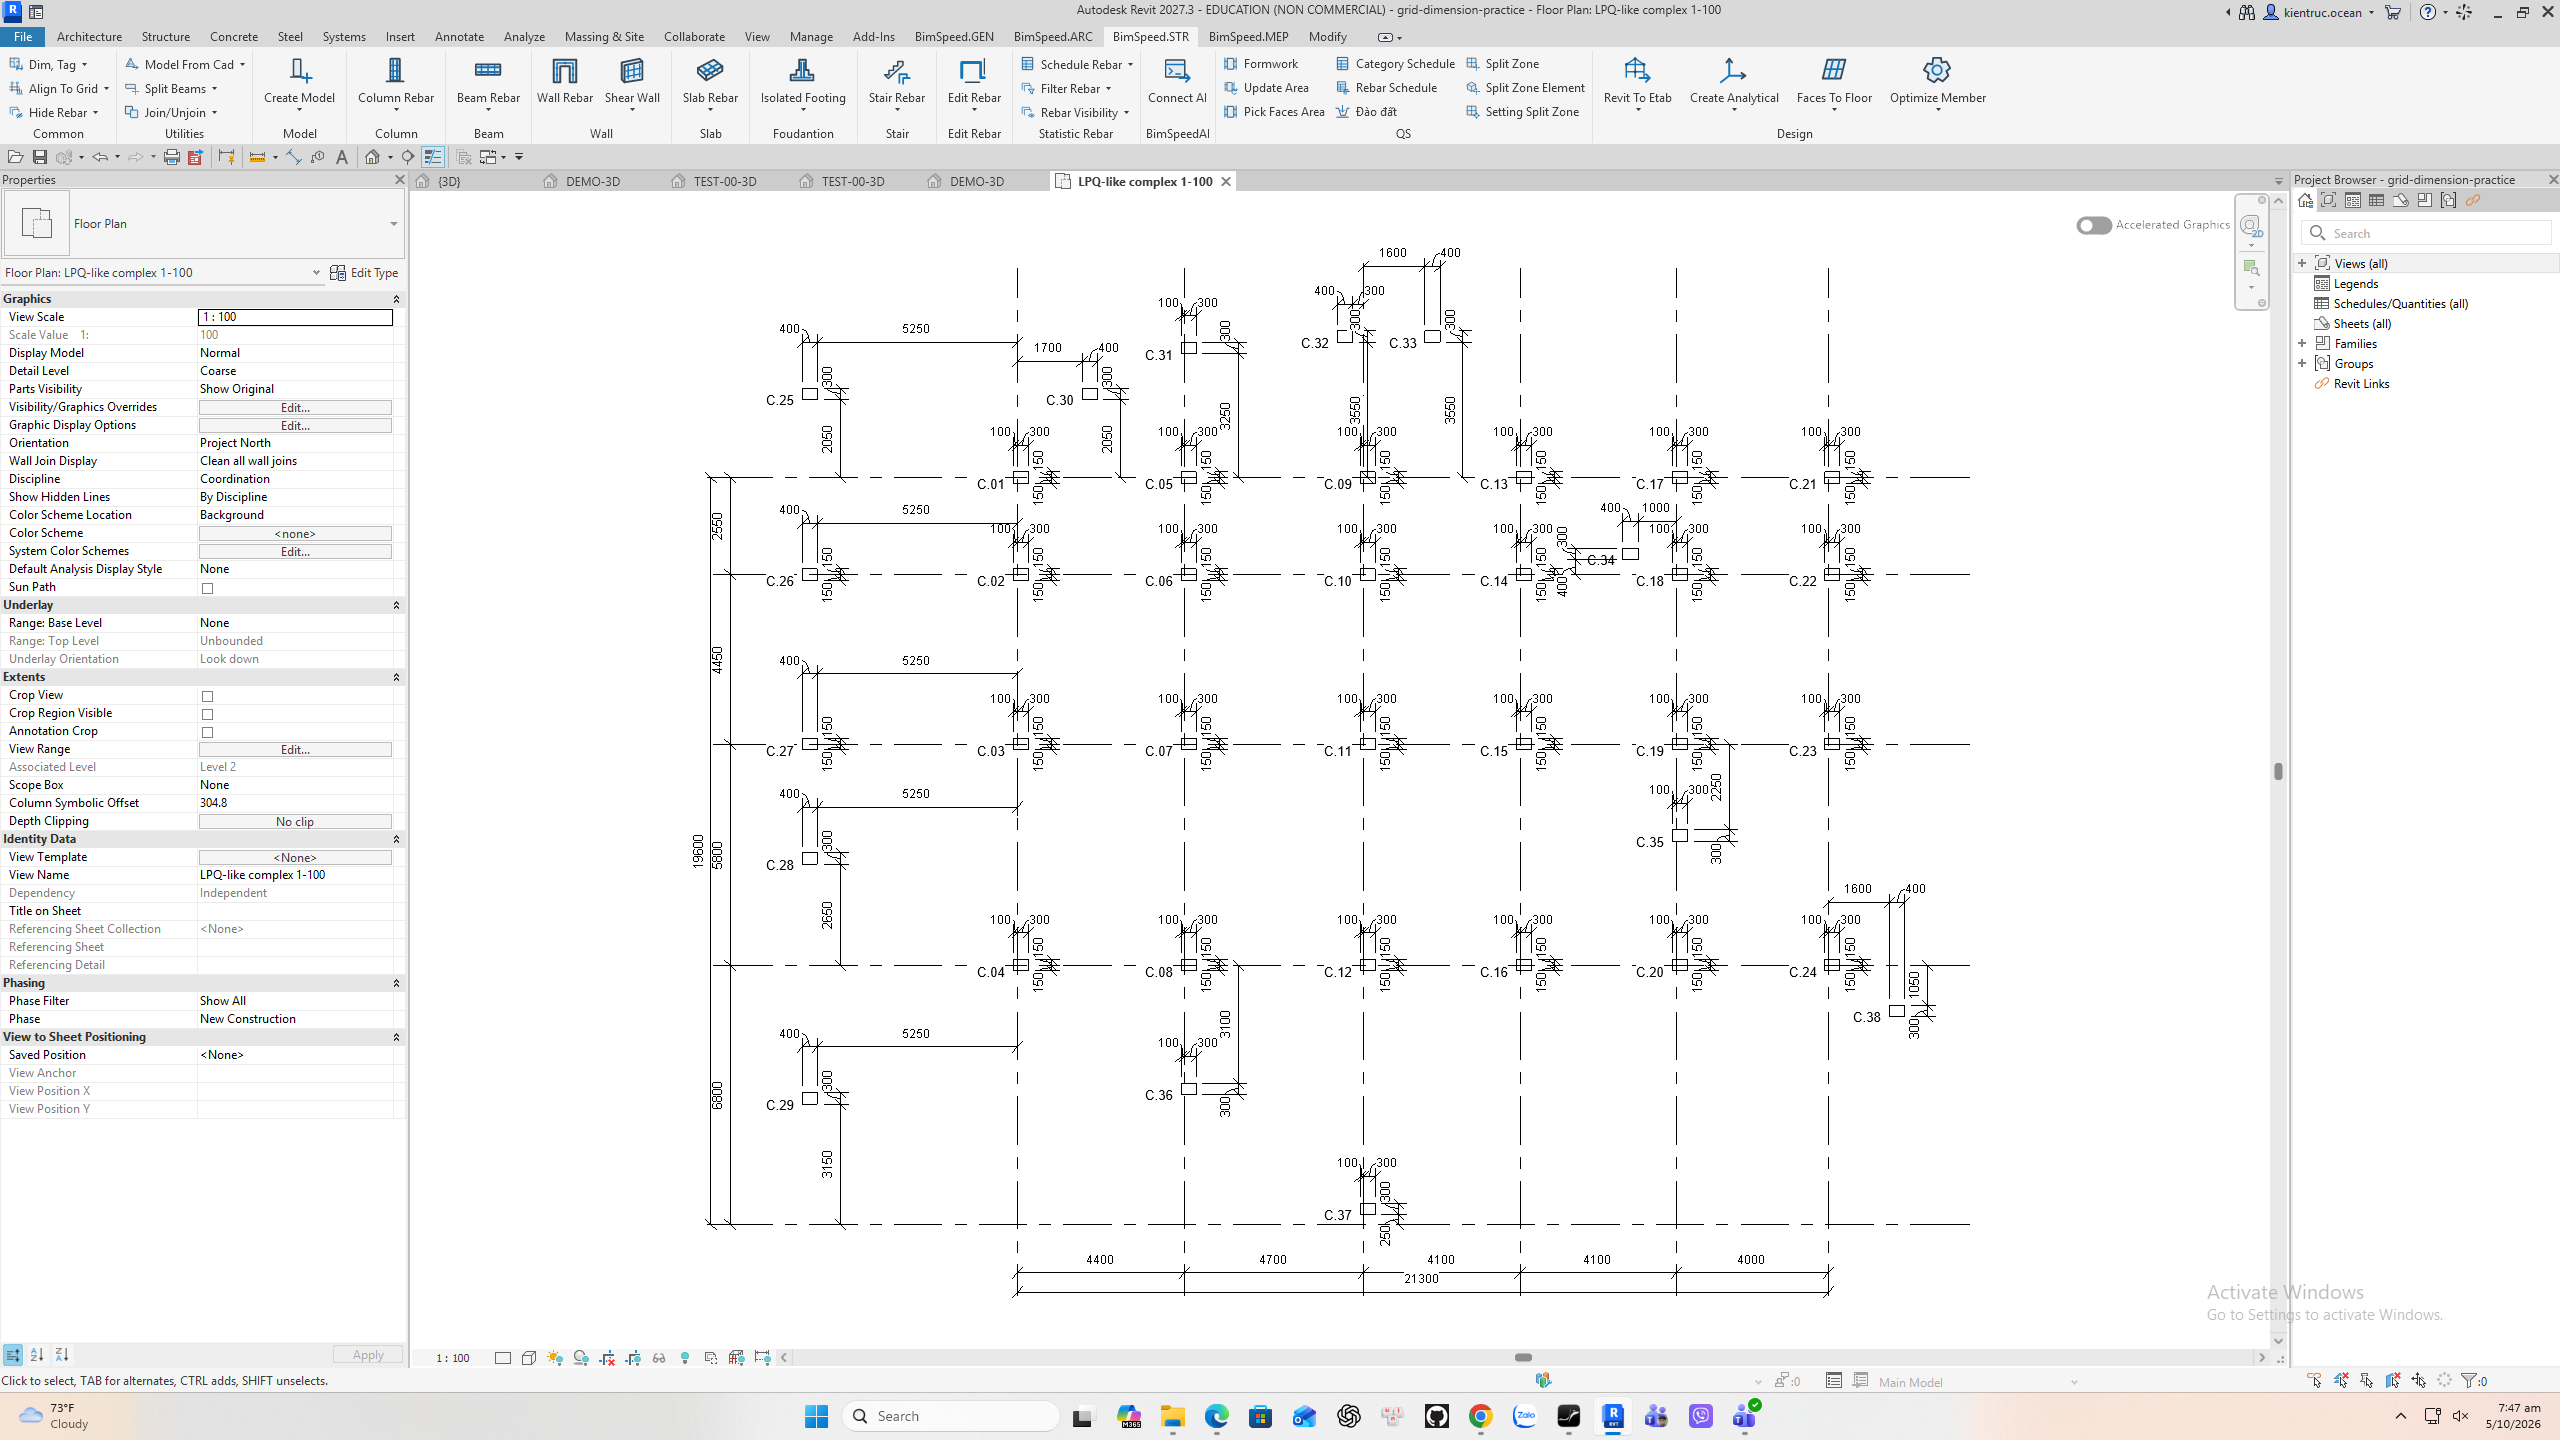
Run Create Grid Dim. Click a straight grid at the location where you want the dimension line. You do not need to click every grid. The command collects visible parallel grids in the active view and creates the individual bays and their overall dimension. In this direction the bays add to twenty one thousand three hundred millimeters.
4. Dimension the perpendicular direction (0:59)
While the command is still active, pick a grid in the perpendicular direction at the desired location. The vertical bays add to nineteen thousand six hundred millimeters. Press Escape when finished. Keep the dimension lines clear of tags and grid bubbles. These dimensions reference the grids rather than manually typed text.
5. Change the gap and overall style (1:17)
Return to Dim Setting. Here we choose a different overall type while retaining Diagonal for the chain. Enter Distance ten after choosing the types, then click OK. At one to one hundred this gives one thousand millimeters of model separation. The type list comes from the current project, so its names may differ in your file.
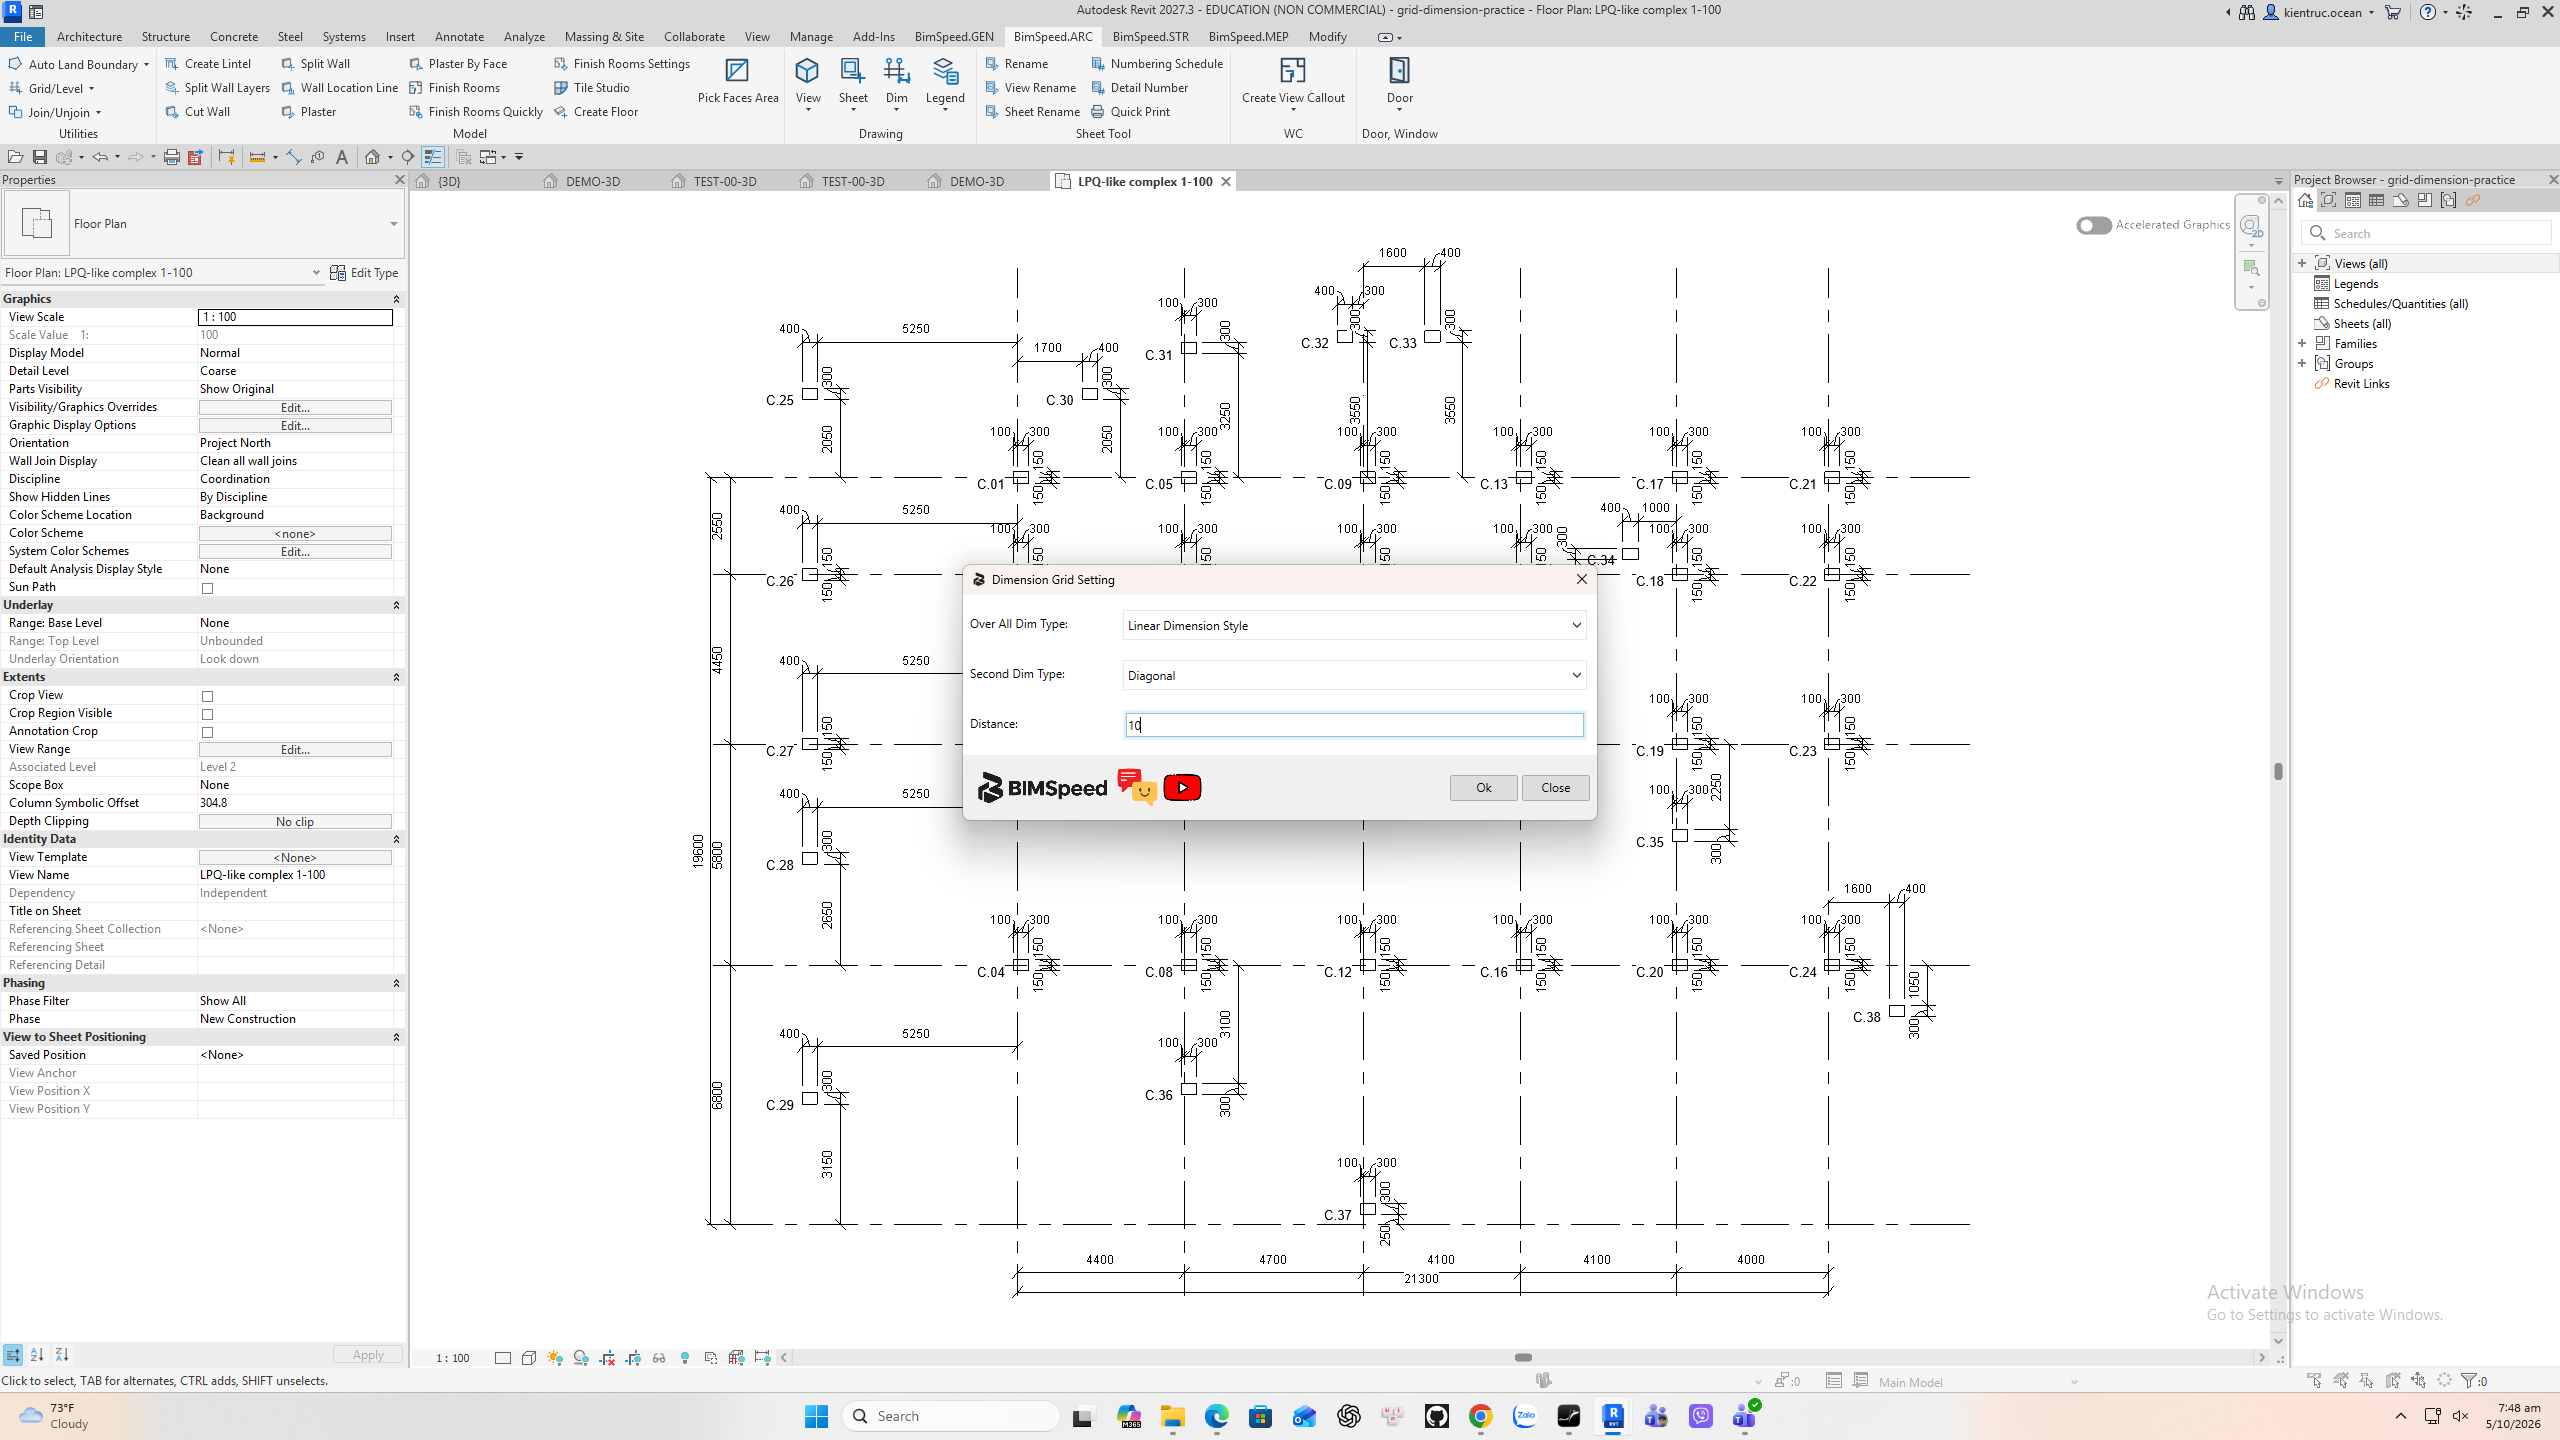
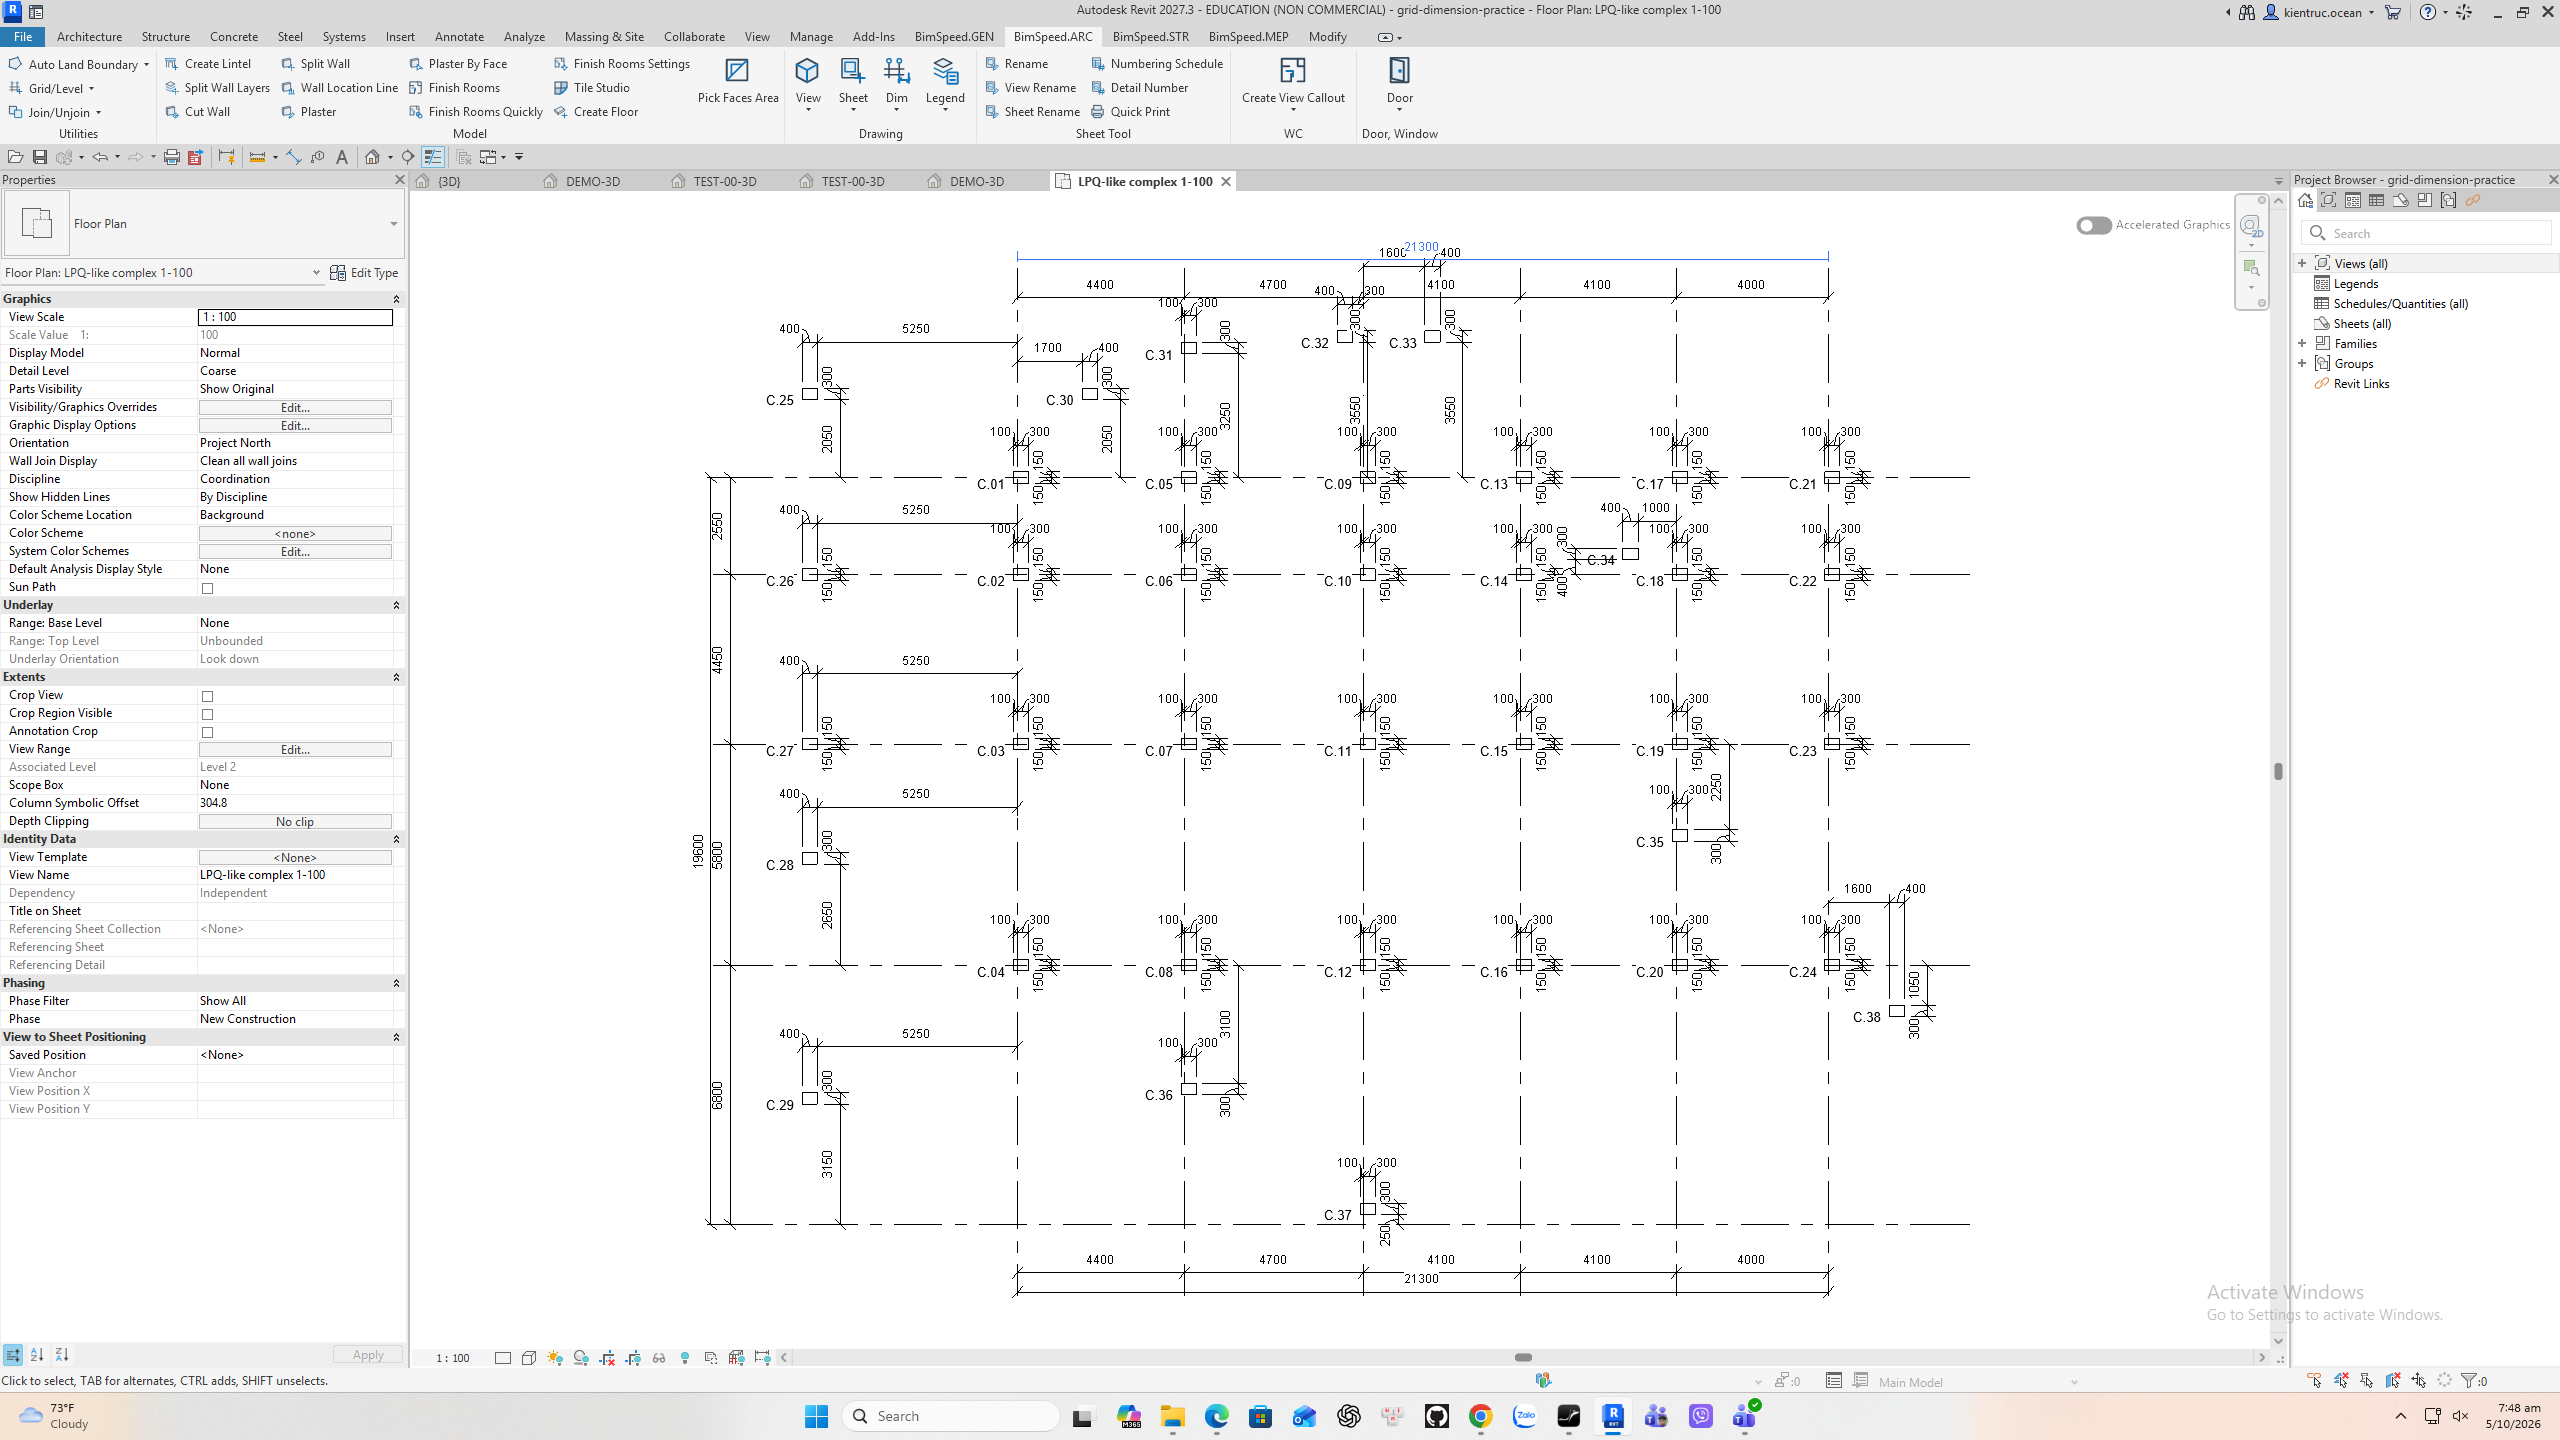
6. Compare and inspect the result (1:37)
Run the command again above the model. The new pair uses the updated gap and overall style. The earlier bottom pair remains. Running the command again adds dimensions; it does not update existing pairs. Select a dimension to verify its type and value in Properties. Delete an unwanted duplicate deliberately or use Undo immediately after creation.
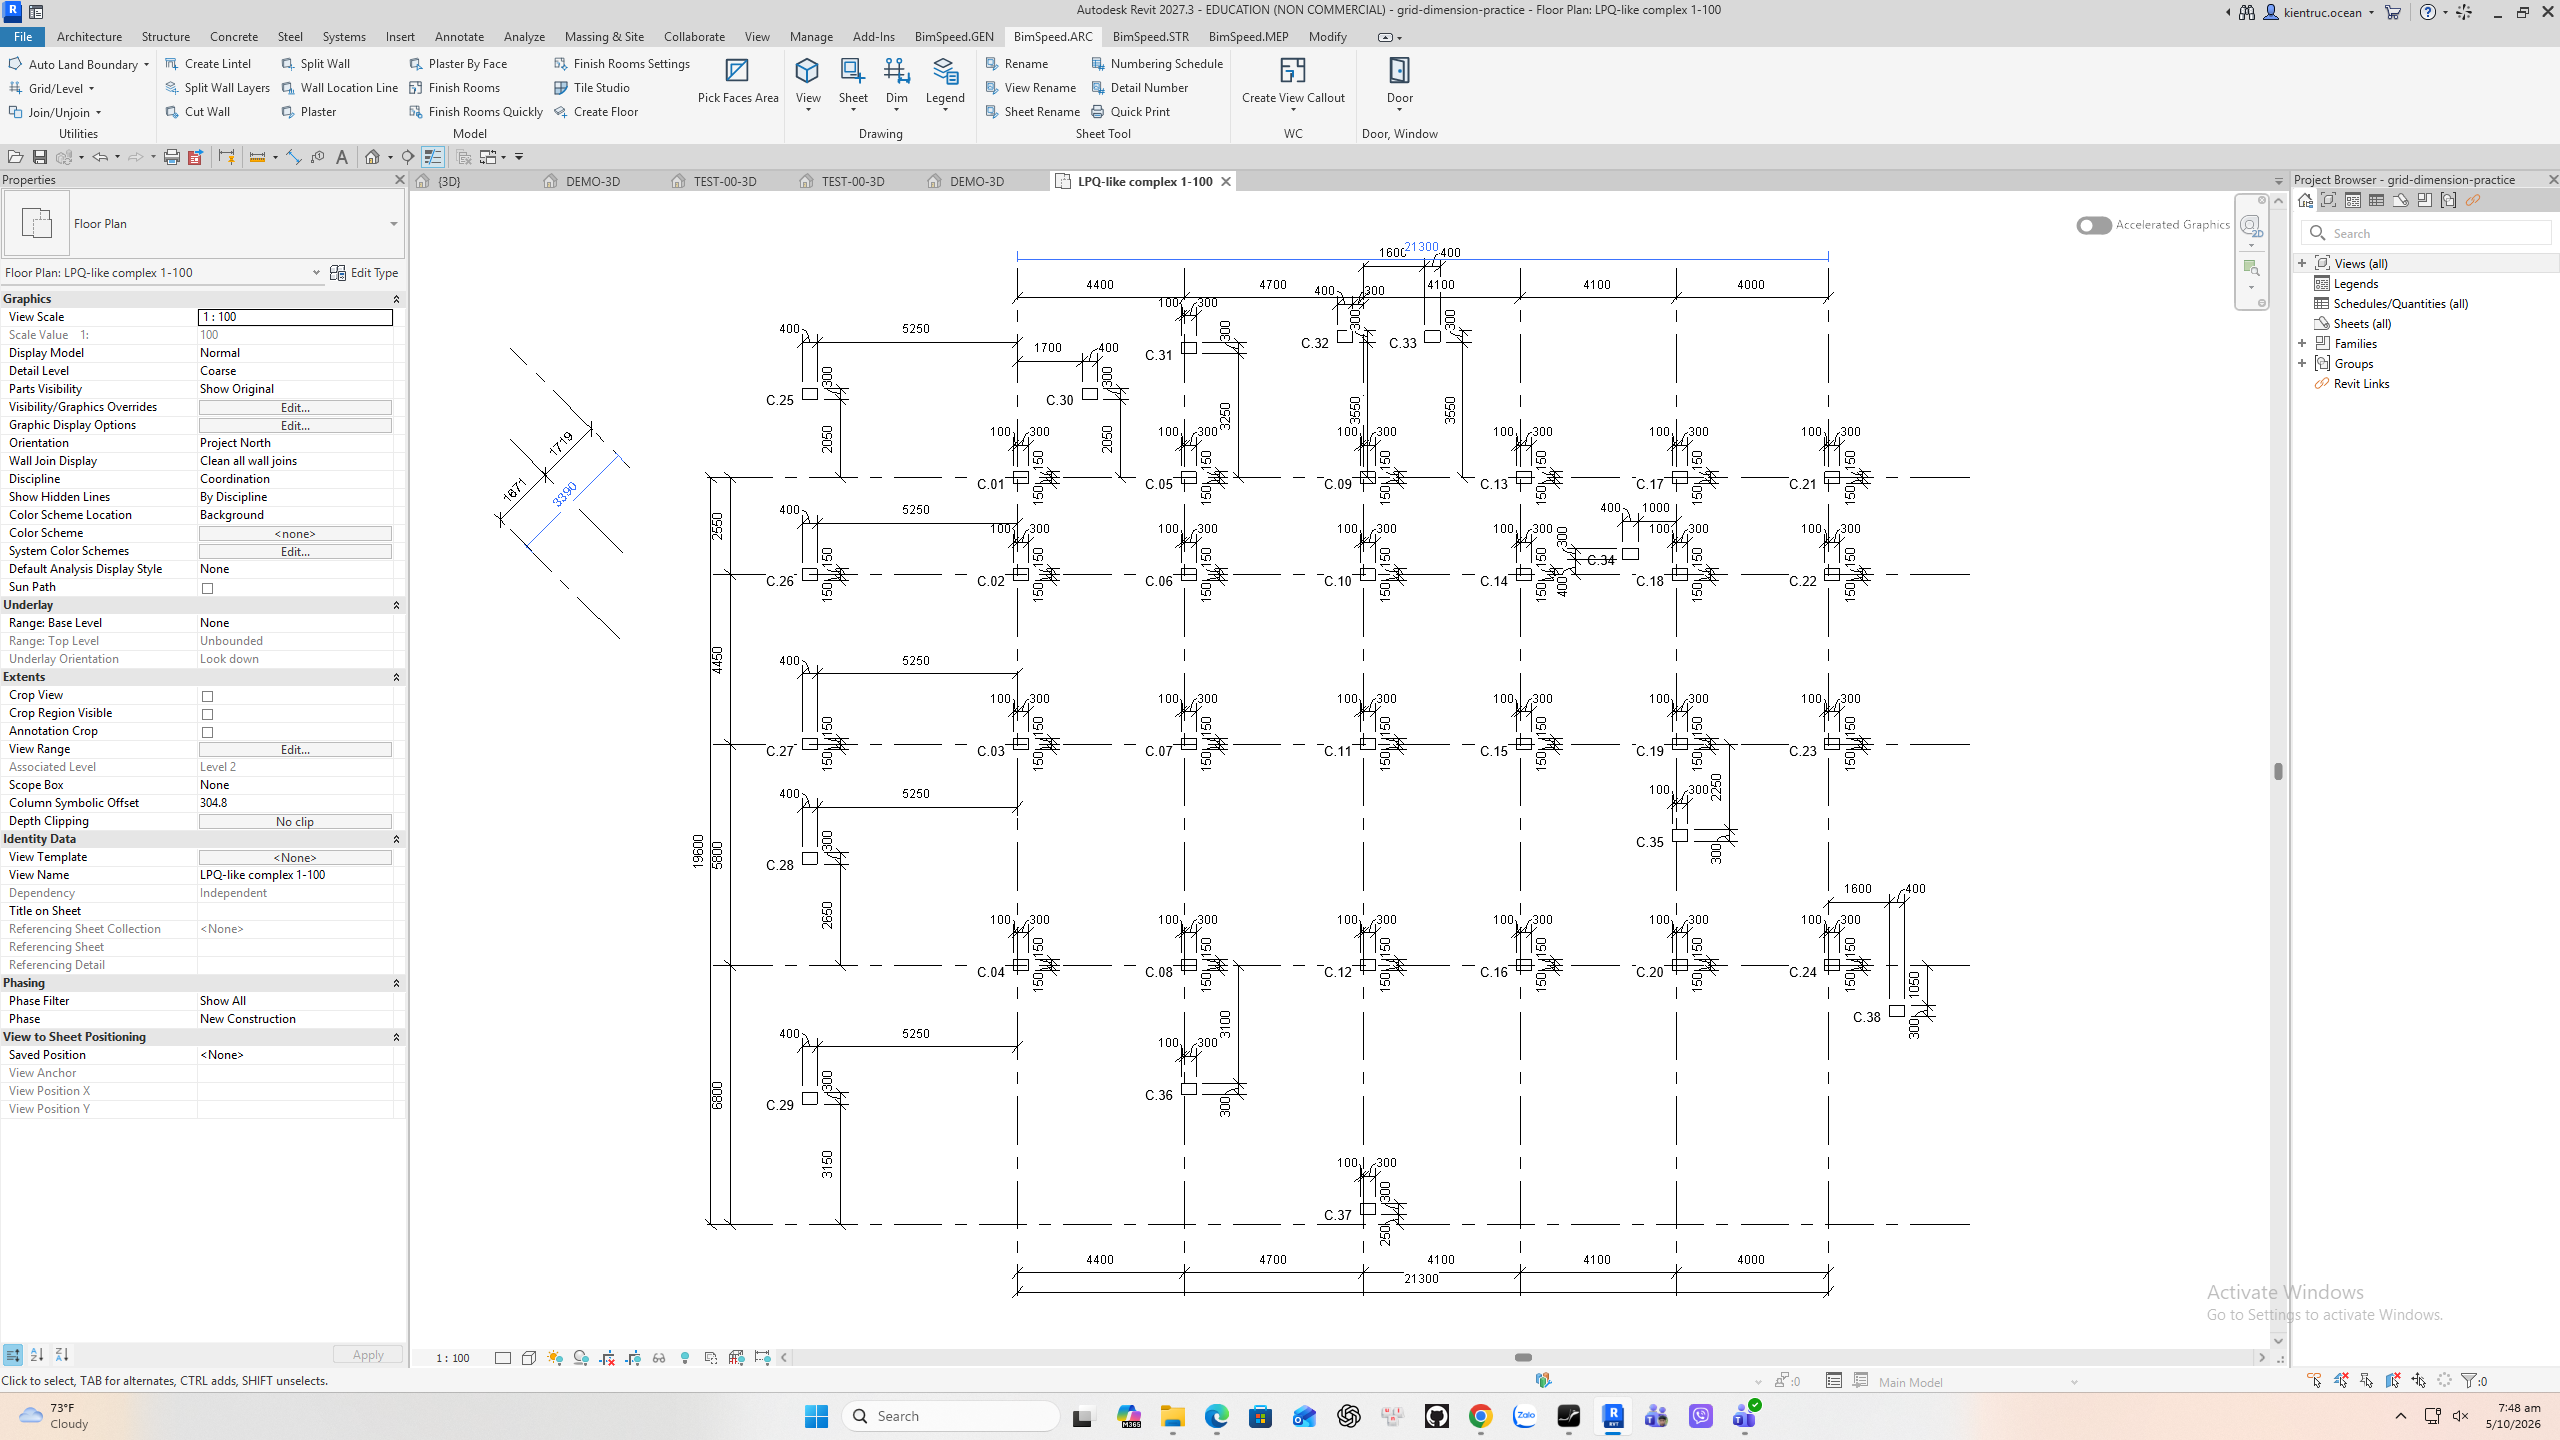
7. Parallel grids at an angle (1:59)
Straight grids do not have to be horizontal or vertical. Here three parallel diagonal grids receive a two segment chain and a total of three thousand five hundred ninety millimeters. Pick one of that parallel group at the desired dimension location. Curved grids are unsupported by this command. Fewer than two valid parallel grids cannot form a chain. Save the practice model after inspecting all three directions.
Practice and safe repetition
Verified horizontal, vertical and oblique straight-grid dimensions, two dimension types and paper-space distance 5/10 mm at 1:100. Curved grids are unsupported. Repeated runs add dimensions.
Download the Revit 2027 practice package, extract the RVT and read README.txt. Save a separate copy before repeating. Use Ctrl+S to save the RVT; saving a tool template alone does not save model changes.